Each tool that is run in a task is executed on a computation instance in the cloud. Instances are virtual computers; different instance types have different allocations of CPU and memory, so are suited for workloads with different computational requirements.
The F4C uses a scheduling algorithm to select an appropriate computation instance for each tool that is run in a task. The algorithm assigns to each a tool an instance that has sufficient resources to run the tool, and, when running workflows made of multiple tools, is optimized to efficiently pack tools onto instances. While the scheduling algorithm will select a default instance that is suitable for your task, in some cases you might want to override the algorithm to select a specific instance type to run the task on. This page explains how to set the instance type for a task.
Take a look at the Seven Bridges scheduling algorithm that is used to allocate instances to tasks.
Seven Bridges scheduling algorithm
To see how tool executions are fitted onto instances, take a look at the scheduling algorithm we use to allocate instances to tasks.
On this page
Available instance types
Available instance types on F4C are shown in the List of available Amazon Web Services US East instances.
Determining instance types
All public tools and workflows have defined requirements for CPU and memory. These are used by the scheduler on the F4C to pick a suitable computation instance for the app to be run on. You can override this selection in a number of ways:
- You can set the instance type for an entire workflow. This will override any setting that you have made for any given tool in the workflow.
- You can set the instance type for any tool (either one you have added to the F4C yourself, using the SDK, or a public tool) using the tool editor. This will override the instance type selected by the scheduler.
- You can set the instance type for any tool(s) in a workflow. This will override any setting you have made on the tool editor.
Choose an instance type that is sufficient for your task
If you override the instance type that the scheduling algorithm selects on the basis of the app's required resources, and instead pick your own instance, you may inadvertently select one that doesn't have enough resources to run the app successfully. To make sure you pick a suitable instance, check the required resources of the tool you want to use. To do this, open the tool in the tool editor, by clicking the Edit button. Note that you can only edit a tool that is in one of your projects.
The tool editor contains fields labelled CPU and Memory (MB). These contain the number of CPUs and amount of memory deemed necessary for running the tool by the person who wrapped it (either one of Seven Bridges' bioinformaticians, in the case of a publicly available tool, or another F4C user who has shared an edited tool with you).
If you try to set an instance type that fails to meet a tool's required resources, then, wherever possible, you will see a warning notification. However, sometimes a tool's required resources are set dynamically. For instance, the tool may require two times as many CPUs as it has input files, and the number of input files to the tool will depend on the behavior of the tool before it in a pipeline. In this case, it may not be possible to raise an error about insufficient resources before running the app, and you will see an error during its execution.
See the documentation on the tool editor for more information on how to describe a tool. In particular, see how to set a tool's required resources. For details of how dynamic expressions may be used, see the documentation on dynamic expressions in tool descriptions.
Running instances in parallel
You can set the maximum number of instances to run in parallel for a workflow. See the instructions below on setting the instance type for an entire workflow for details.
Set the instance type for a workflow
You can set the instance for an entire workflow. This means that all tools in the workflow run on the selected instance type.
- To set the instance type for a workflow, you should add it to a project. Then, on the Apps tab of the project dashboard, click the pencil icon next to the tool to open the workflow editor.

- Click the ellipses icon (. . .) in the top right corner of the workflow editor, and select Settings.
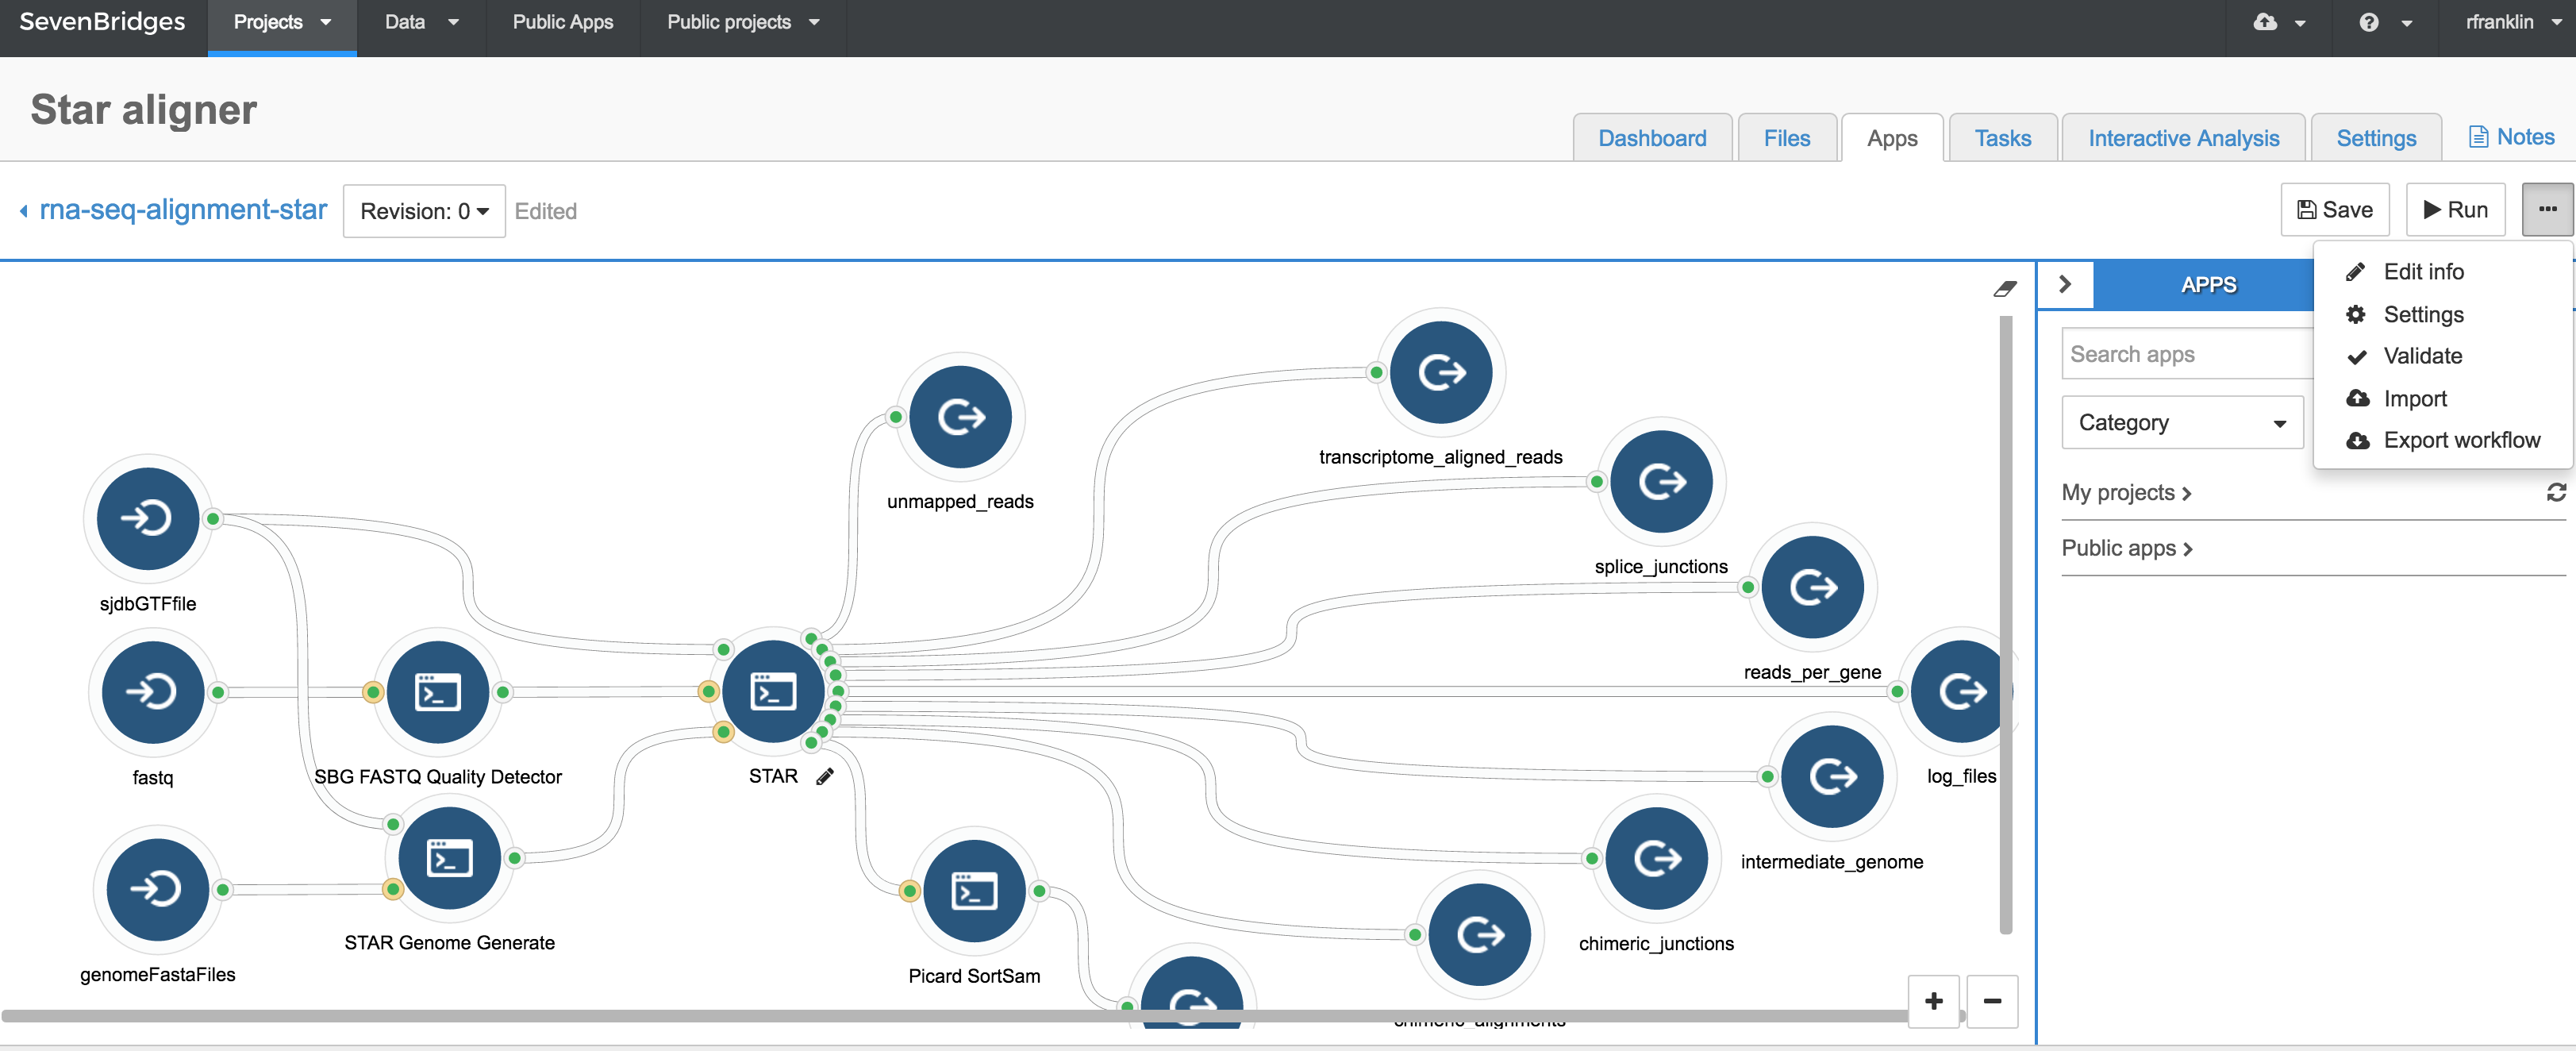
- You will see the Workflow settings popup window, shown below. Enter the following information:
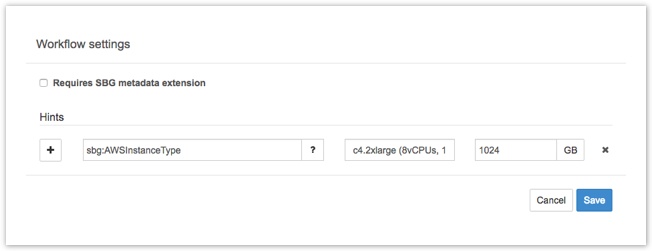
To set the instance type:
In the field marked Requirement class enter 'sbg:AWSInstanceType'.
In the field marked Requirement value enter an instance type from the following table. When you start typing an instance type, you will see automatically generated suggestions in the drop-down box. In the field on the right, you can set the size of storage attached to the computation instance.
On the Workflow settings popup you can also set the maximum number of instances to be used in parallel by the workflow.
To set the maximum number of instances to be used in parallel:
Click the plus (+) icon to create new empty fields.
In the field marked Requirement class enter 'sbg: maxNumberOfParallelInstances'.
In the field marked Requirement value enter the number of instances to be run in parallel as an integer.
Set the instance type for a tool
You can set the instance type for a tool in the Tool Editor.
- To set the instance type for a tool, you should add it to a project. Then, on the Apps tab of the project dashboard, click the pencil icon next to the tool to open the tool editor.

- Click the ellipses icon (. . .) in the top right, and select Settings.
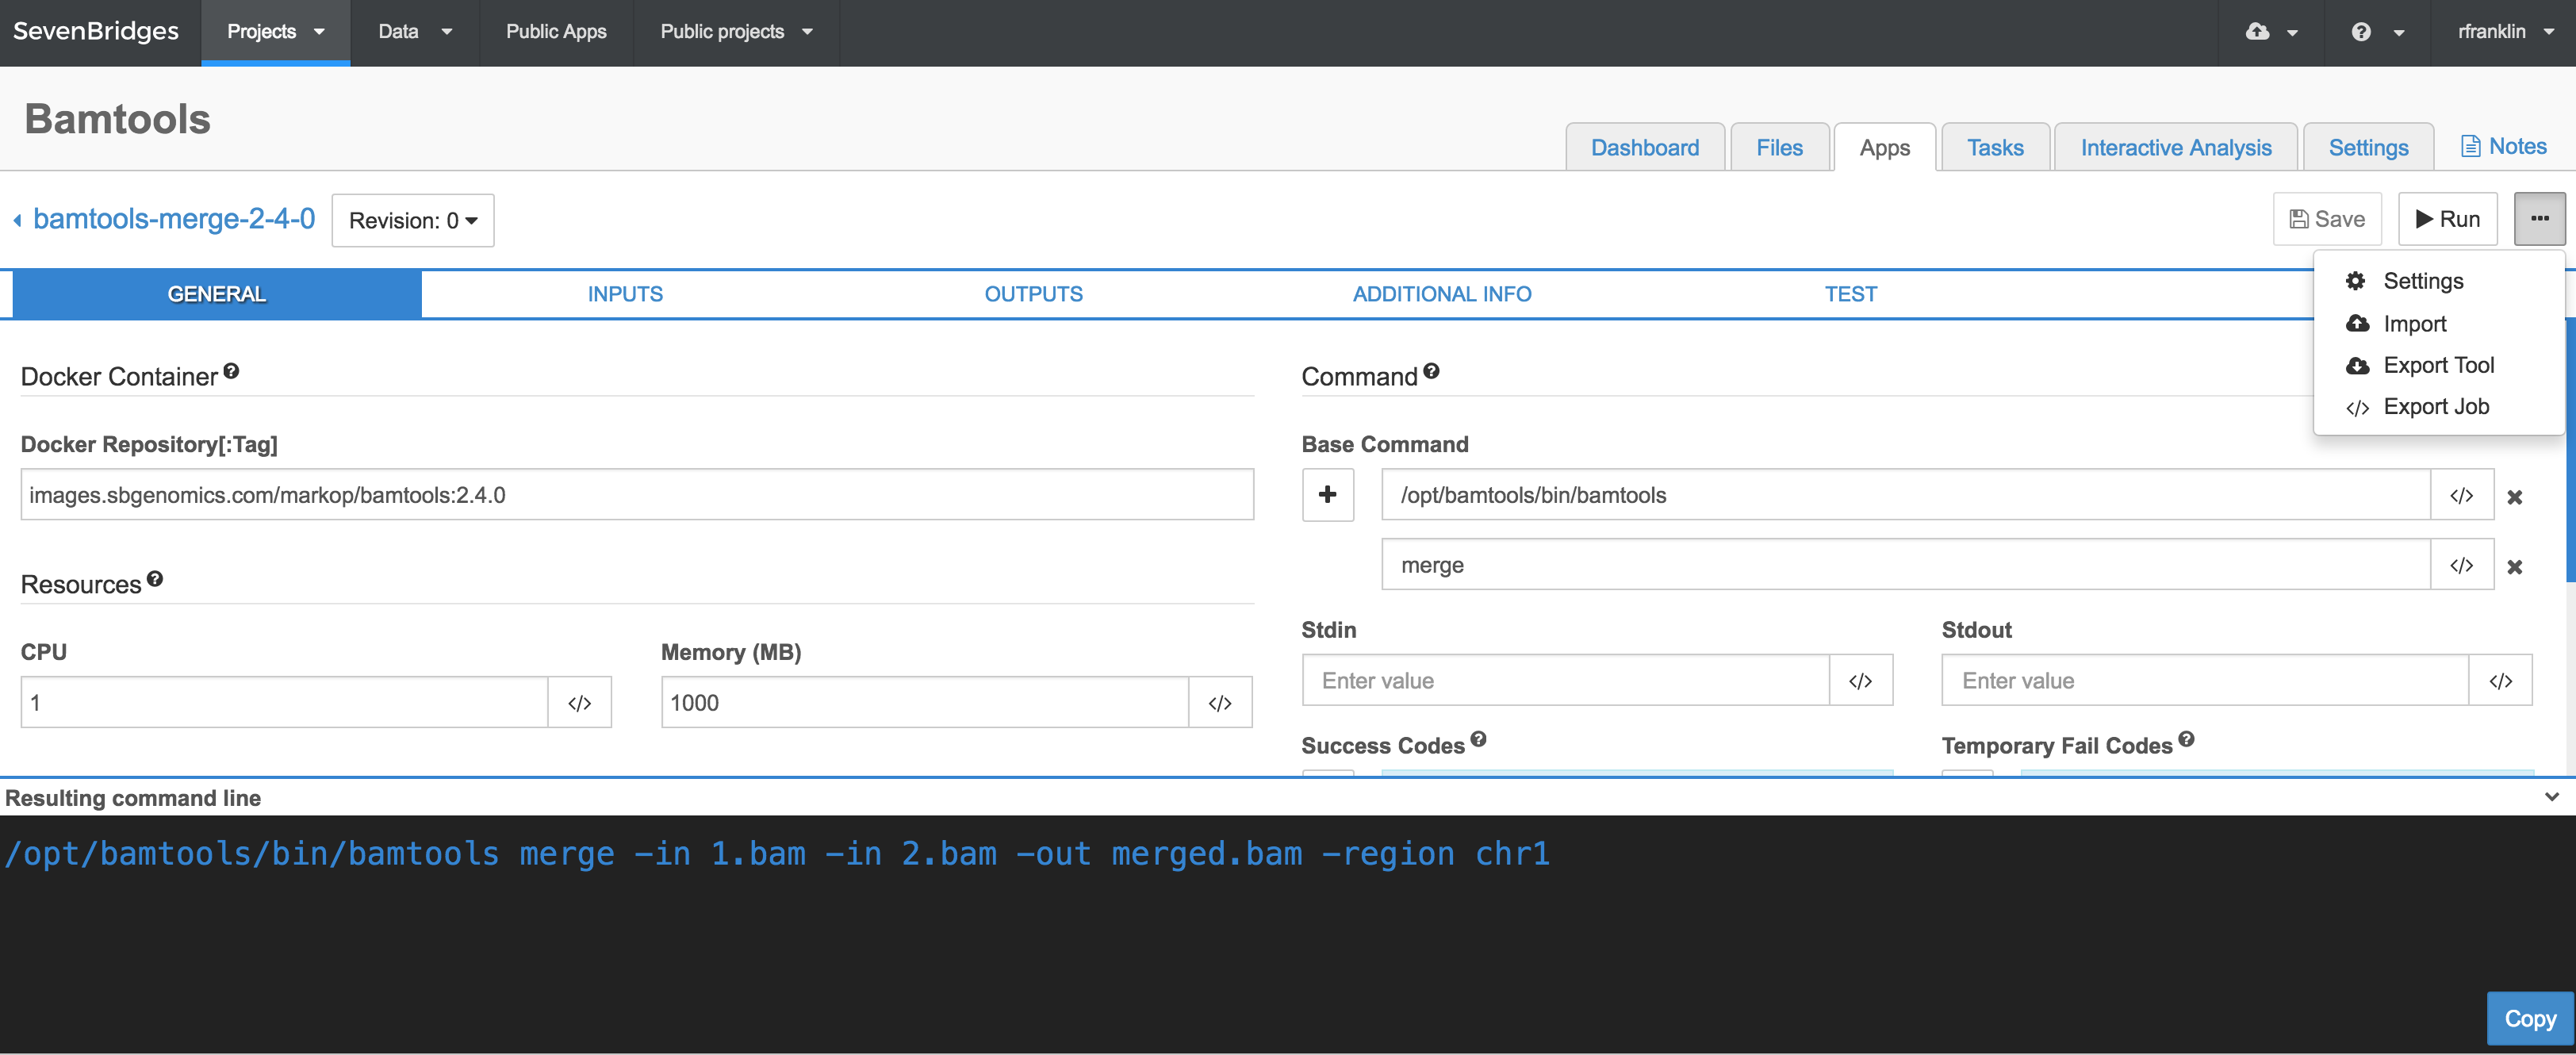
- You wll see the Tool settings popup, shown below. On the Tool Settings pop-up, click the plus icon (+).
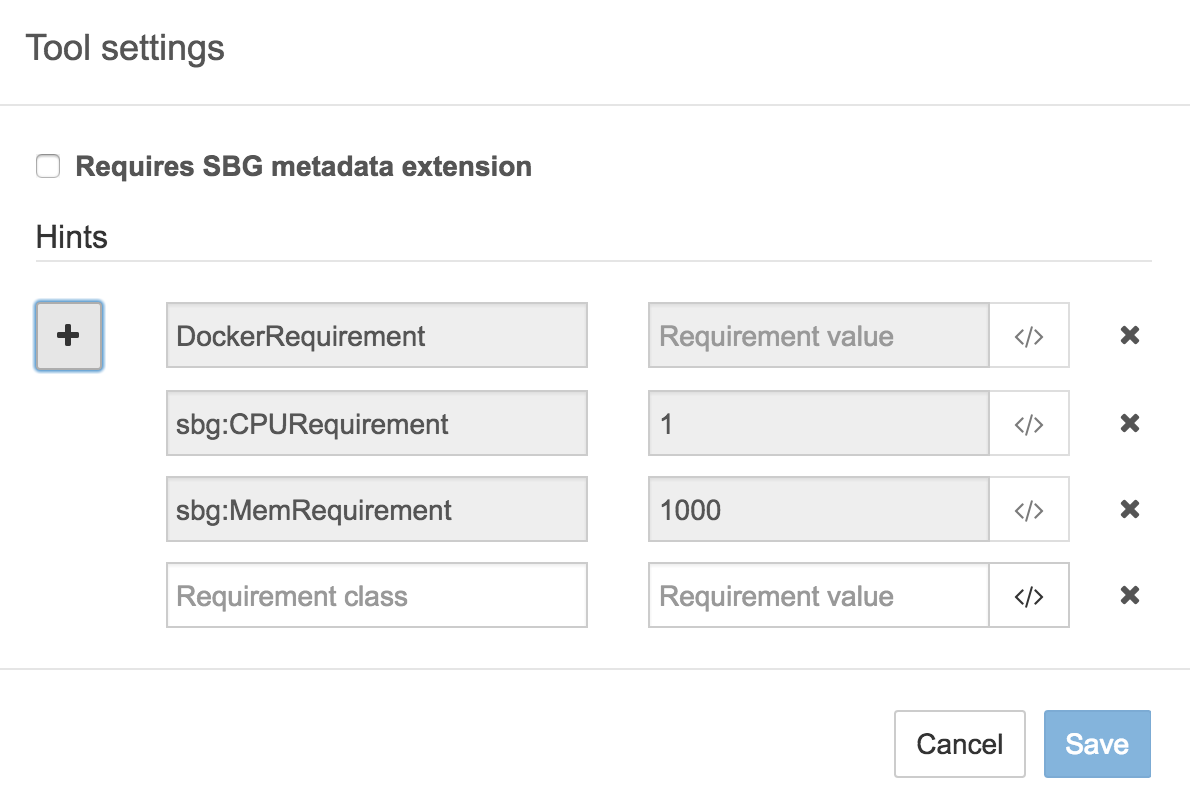
- Then enter the following information:
To set the instance type:
In the field marked Requirement class enter either 'sbg:AWSInstanceType'.
In the field marked Requirement value enter an instance type from the following table. When you start typing an instance type, you will see automatically generated suggestions in the drop-down box. In the field on the right, you can set the size of storage attached to the computation instance.
Set the instance type for a tool in a workflow
You can set the instance type(s) of individual tools in a workflow. For instance, you might want to use a smaller, cheaper, instance type for most tools in your workflow, but provide one tool with a more powerful instance.
Note that if you are running the tool on its own and not in a workflow, see the instructions on how to [set the instance type for a tool that is not in a workflow](doc: set-computation-instances#section-set-the-instance-type-for-a-tool).
-
Select the workflow that you want to configure. This can be a public workflow (in which case, you must have copied it to a project
to edit it), or it can be a workflow you have built yourself. -
Click the pencil icon to open the workflow in the workflow editor.

- In the workflow editor, click the node representing the tool in the workflow whose instance you want to set. Selecting a node will show a green ellipses icon. In the example below, you can see this icon above the STAR node in the rna-seq-allignment-star workflow. Note that input and output nodes in a workflow don't represent tools, and you can't set their instances.
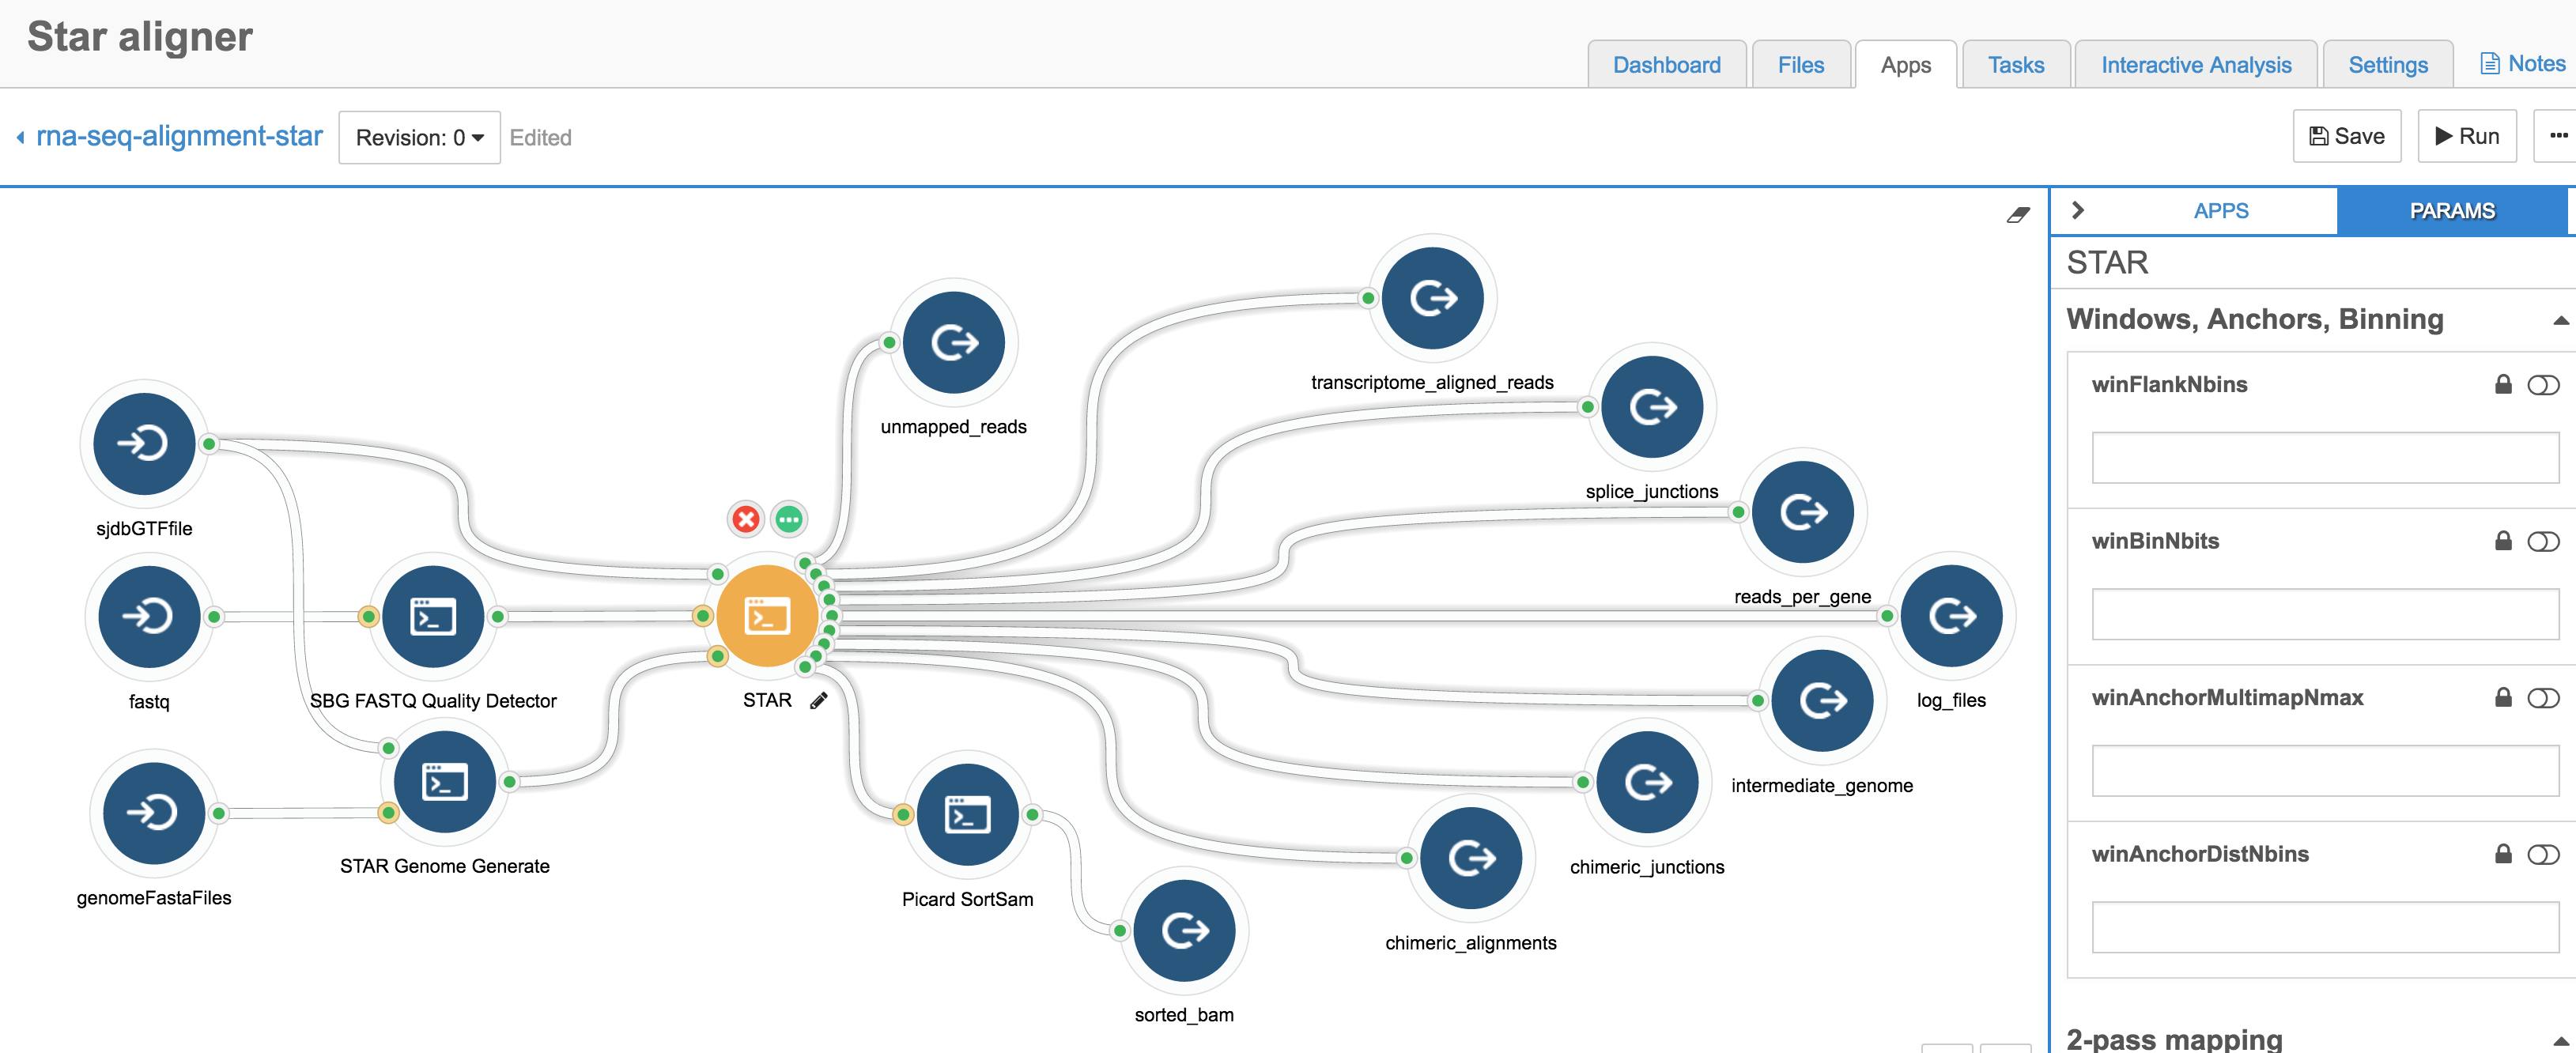
- Click the green ellipses icon (. . .) to see the settings for the node. Click the tab marked HINTS.
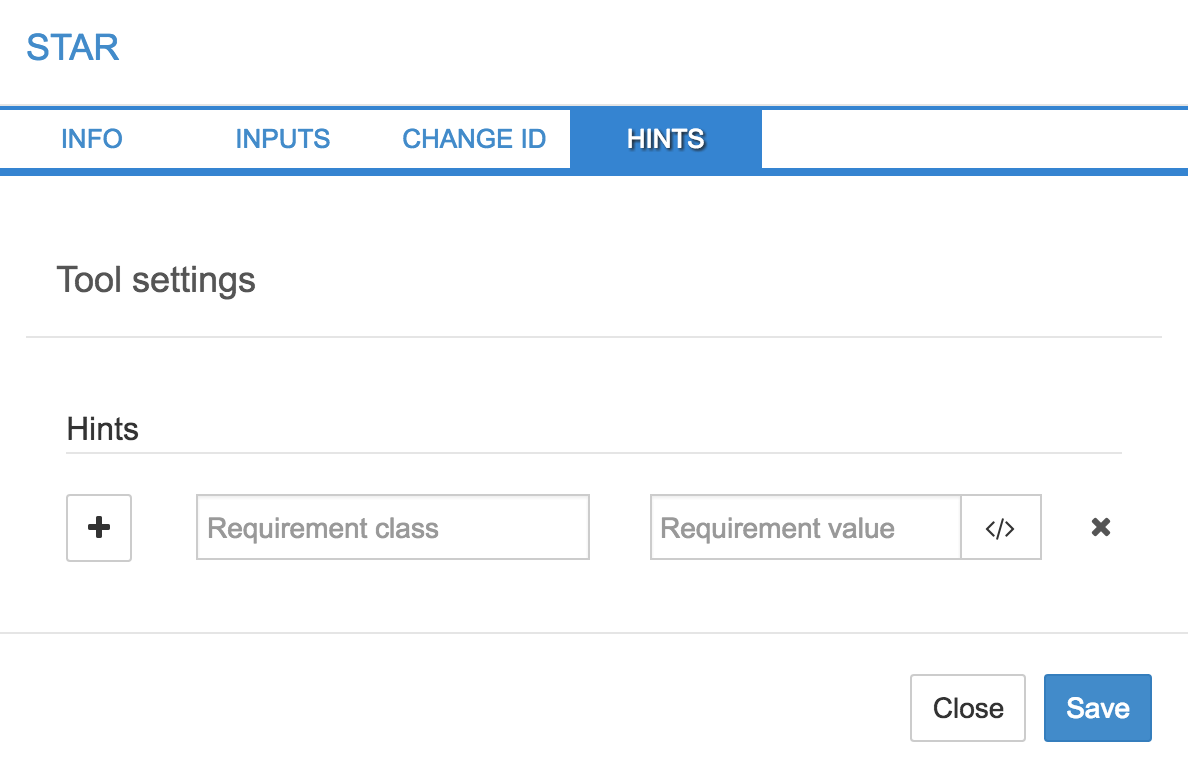
- Then enter the following information:
To set the instance type:
In the field marked Requirement class enter 'sbg:AWSInstanceType'.
In the field marked Requirement value enter an instance type from the following table. When you start typing an instance type, you will see automatically generated suggestions in the drop-down box. In the field on the right, you can set the size of storage attached to the computation instance.
Set attached storage size
When setting the sbg:AWSInstanceType instance hint, the configuration options are instance type and attached storage size. Attached storage includes EBS disks that are used by the computation instance as storage capacity during task execution. To set up attached storage, in the field Attached Storage, enter the needed storage size:
- If you have selected an instance that has its own storage (ephemeral storage), the storage size will be displayed in brackets next to the instance name. However, you can still define a different storage size (from 2 GB to 4096 GB) in the Attached Storage field, in which case the F4C will use EBS storage instead of the instance's ephemeral storage, and EBS costs will be added to the cost of running the computation instance. Read more about EBS pricing.
- If you have selected an Amazon EBS-only instance (no storage capacity shown in brackets next to CPU and memory values), you can change attached storage size to any value from 2 GB to 4096 GB in 1 GB increments. Attached storage costs will be added to the compute instance cost, according to the EBS pricing model.
Updated less than a minute ago
