Plot exporter module
The Plot Exporter Module enables users to save and export plots generated within a Shiny app to the Seven Bridges Platform. This module provides a user-friendly interface for exporting plots in various formats and integrates seamlessly with the server-side logic of your Shiny app
UI function
The UI function for the Plot Exporter Module creates an action button that triggers a modal dialog for exporting plots. This modal dialog includes settings for selecting output formats and managing export options.
Parameters
| Name | Description |
|---|---|
| id | the unique identifier for the module instance |
| save_button_title | the label for the button that triggers the export modal. |
UI function call
mod_plot_exporter_ui("plot_exporter_1", save_button_title = "Save Plot")

Server function
The server function handles the logic for exporting plots. It integrates with reactiveValues to manage the plot object and provides settings for output formats and directory paths. This function is crucial for enabling users to export plots in various formats and save them to the Seven Bridges Platform.
Parameters
| Name | Description |
|---|---|
| id | The module ID. |
| output_formats | A `reactiveValues object containing a plot slot with the plot object created using recordPlot(). This is the plot which will be exported. |
| module_title | The supported output formats for exporting the plot: "png", "pdf", "svg", "jpeg", "bmp", and "tiff". |
| sbg_directory_path | Path to the mounted /sbgenomics directory, which should include project-files, output-files, and workspace sub-directories. This directory structure must exist on the instance where the app runs. For local testing, create a mock directory with the same structure and populate it with test files. |
| btns_div_width | Width of the div() containing the buttons for saving plots in the modal dialog. Default is 12. |
Server function call
mod_plot_exporter_server(
"plot_exporter_1",
plot_reactVals = helper_reactive,
output_formats = c("png", "pdf"),
module_title = "Export Plot",
sbg_directory_path = "/sbgenomics",
btns_div_width = 12 )
Note: If you are developing a Shiny application that will be hosted on-demand on the Seven Bridges Platform, the sbg_directory_path parameter should be set to the default value of /sbgenomics. This path points to the /sbgenomics directory, which already includes the project-files, output-files, and workspace sub-directories. For local testing of your application, you can create a mock sbgenomics directory with the same structure—containing project-files, output-files, and workspace sub-directories. Populate this mock directory with test files that replicate the project file structure on the Platform.
Usage example
To use the Plot Exporter Module in a Shiny app, follow these steps:
- Add the UI Function: Place mod_plot_exporter_ui("plot_exporter_1", save_button_title = "Save Plot") in the UI section where you want the export button to appear.
- Add the Server Function: Include mod_plot_exporter_server("plot_exporter_1", plot_reactVals = helper_reactive) in the server section of your app. Ensure that plot_reactVals contains the plot object created with recordPlot().
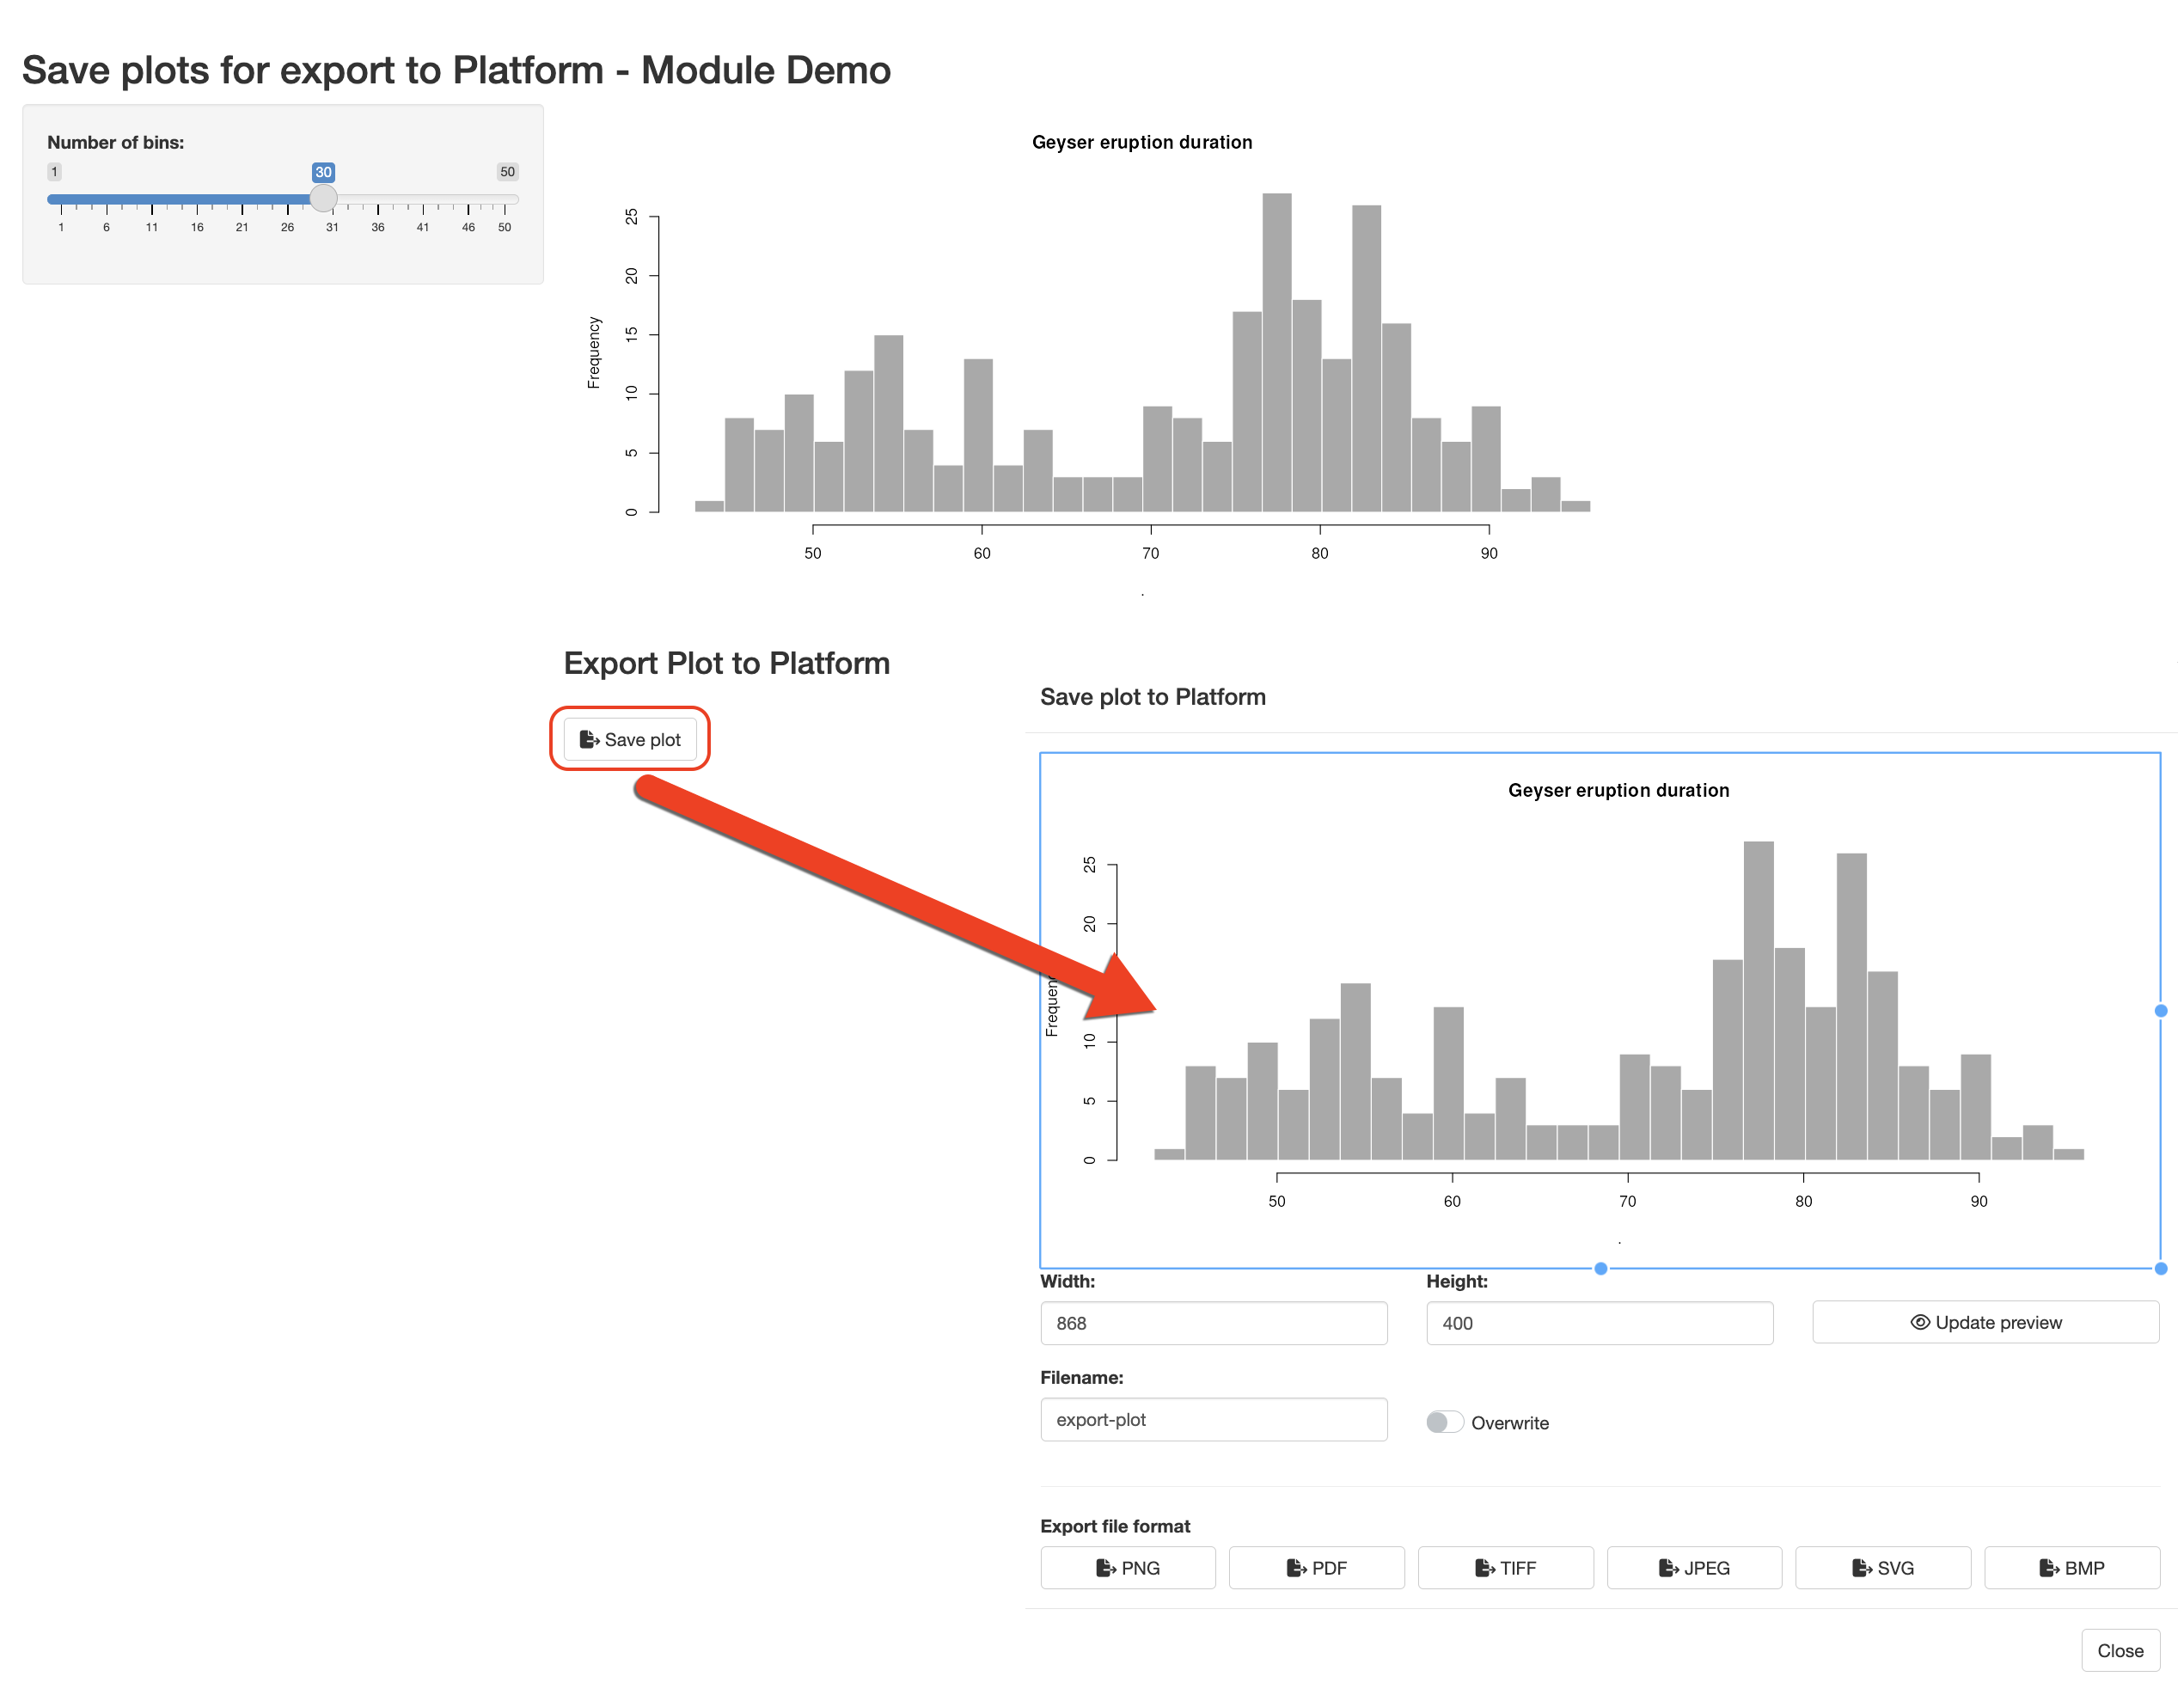
Modal dialog features
When users click the Save Plot button, a modal dialog appears, offering several advanced features for customizing and exporting the plot. Here is a detailed overview of these features:
The following options are available for customizing the plot exported modal dialog.
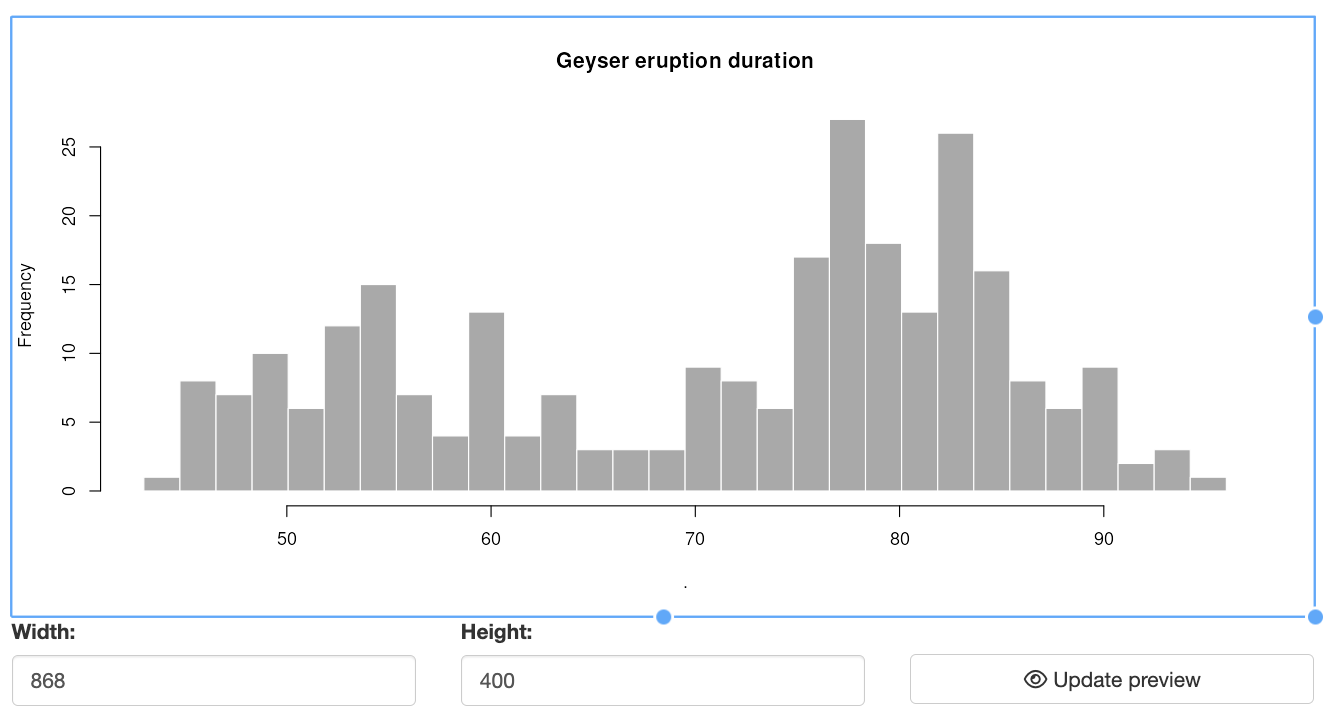
Plot resizing
The modal dialog provides two options for resizing the plot before saving:
-
Interactive Resizing: Users can drag and resize the plot box using a cursor. This functionality leverages the React Moveable library, allowing users to adjust the plot dimensions directly. As users resize the box, the plot within it automatically adjusts to fit the new size, and the modal dialog resizes accordingly to accommodate the updated plot dimensions.
-
Manual Resizing: Users can also specify the plot width and height manually. By entering the desired dimensions and clicking the "Update Preview" button, the plot and modal dialog will adjust to reflect the new size. This option provides precise control over the plot appearance.
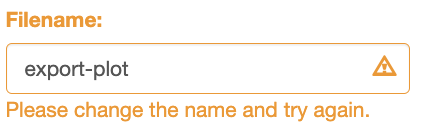
File naming and validation
The modal dialog includes a text input element where users can set the name (base name) for the plot file. Key aspects of this feature include:
-
File Name Validation: The module performs real-time validation to check if a file with the same name (base name + extension) already exists in the project directory or if it is previously saved within the same session (stored in the output-files). If a conflict is detected, a warning message is displayed near the text input field, prompting users to choose a different name.
-
Overwrite Option: For cases where users prefer to overwrite an existing file, an overwrite switch is available. This option allows users to save the plot with the same name, regardless of existing files in the project directory.

File format selection
At the bottom of the modal dialog, users can choose from various file formats for exporting the plot. This section includes:
-
Format Buttons: The dialog features buttons for the default file formats: PNG, PDF, SVG, JPEG, BMP, and TIFF. The specific formats available are controlled by the output_formats parameter in the mod_plot_exporter_server() function. By default, all six formats are shown, but you can limit the options to a subset of these formats.

-
Saving the Plot: Clicking a format button triggers the plot export process, using the specified base name and the selected file extension. This action also invokes the file name validation mechanism described above, ensuring that users are alerted to any potential conflicts before saving.
Please note: By default, the plot files are saved in the /sbgenomics/output-files directory. Once the Shiny app is stopped, these files will be accessible from the "Files" tab of the project from which the app was launched.
Explore a sample application utilizing the plot exporter module at this location: inst/demos/plot_exporter_demo_app.R.
In this example, helper_reactive variable is used to store the plot object. The UI function creates the button for triggering the export, and the server function handles the export settings and file saving.
Updated almost 2 years ago