Getting started
Overview
This guide aims to help you create an account on NHLBI BioData Catalyst Powered by Seven Bridges and learn the basics of creating a workspace (project), running an analysis, and searching the hosted data.
Accessing hosted datasets on BioData Catalyst
BioData Catalyst hosts a number of controlled datasets from the Trans-omics for Precision Medicine (TOPMed) initiative, as well as many other large NHLBI-sponsored studies such as RECOVER. These datasets are stored in Amazon Web Services (AWS) and Google Cloud storage buckets operated by NHLBI, enabling users to access the same copy of the data.
Access to these hosted datasets is controlled programmatically by services within the BioData Catalyst ecosystem for user authentication and authorization.
Users log into BioData Catalyst platforms using their eRA Commons credentials and authentication is performed by the NIH Researcher Auth Service (RAS).
User permissions on the hosted controlled data are read from the NIH Database of Genotypes and Phenotypes (dbGaP). Users who want to access controlled studies on the ecosystem must have an approved Data Access Request (DAR) in dbGaP.
Principal Investigators who have approved DARs will be able to access the controlled datasets on BioData Catalyst. To enable lab staff to access the hosted datasets on BioData Catalyst, Principal Investigators must give the lab staff “designated downloader status” on dbGAP. These individuals must:
- Have an eRA commons account or an NIH username and password. Please see these instructions.
- Log in to dbGaP at least once.
To give lab staff downloader status, please refer to these instructions. Please note that having other researchers listed on your dbGaP DAR application as internal and external collaborators will not result in these individuals getting access to hosted dataset on BioData Catalyst.
PIs need to add internal collaborators from their dbGaP application to the list of designated downloaders as described above. In addition, external collaborators will need to go through this same process for those at their own institution.
Researchers can bring their own datasets to the BioData Catalyst platforms. As described in the BioData Catalyst Data Use Policy, users can upload data for which they have the appropriate approval provided that they do not violate the terms of their Data Use Agreements, Limitations, or Institutional Review Board policies and guidelines.
Learn more about how to bring your own data to the Platform.
Account Registration on BioData Catalyst powered by Seven Bridges
To create an account, visit the platform login page at https://platform.sb.biodatacatalyst.nhlbi.nih.gov.
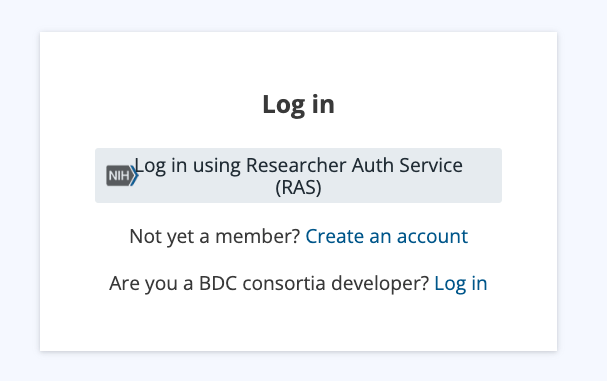
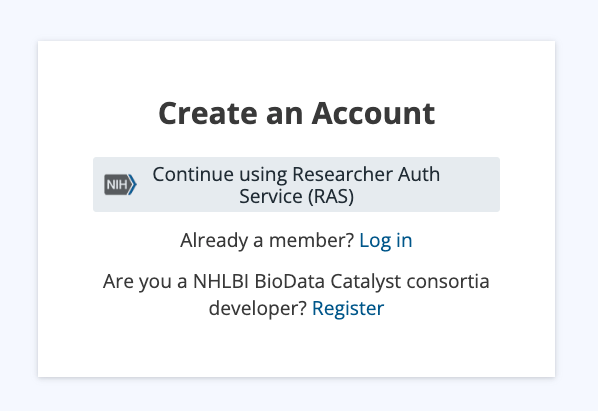
Select “Create an account” and then “Continue with eRA Commons.”
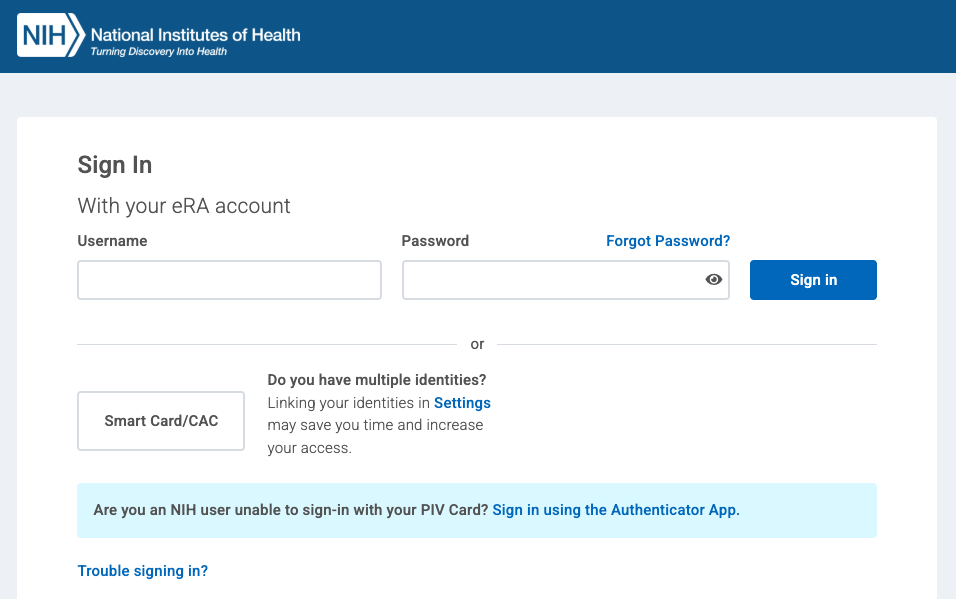
You will be redirected to the NIH Researcher Auth Service (RAS) Sign In page. Enter your eRA commons credentials.
Then you will be directed to the account registration page. For platform username, we suggest using “firstnamelastname” or “firstname.lastname” since this will make it easier for other platform members to find you for collaboration. Usernames can not be changed after creation.
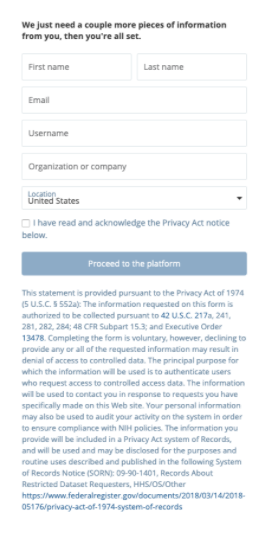
After clicking “Proceed to the platform,” the system will verify your email.
The Seven Bridges team is eager to help you get the most out of using the platform. We would like to hear about your analysis plans so that we can support your research to the best of our abilities. Please contact us at [email protected] and you will be put in touch with a team member who can help you get started.
Controlled data questionnaire
For users with approval for controlled hosted data on BioData Catalyst, like the TOPMed studies, you will be prompted to take a “Controlled data questionnaire” the first time you login. Please refer to the explanations below for filling out the questionnaire. If you have any questions, don’t hesitate to reach out to [email protected].
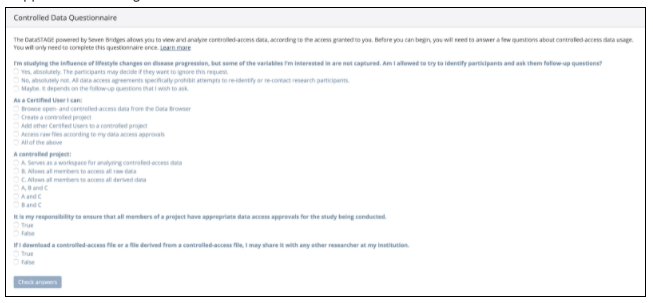
Projects: Projects are workspaces that serve as containers for files, bioinformatics tools and workflows, and analyses. Users can create projects and add collaborators to those projects with specific permissions for what those collaborators are able to see and do within the project.
Raw data: This refers to the hosted datasets on the platform. Access to these raw files is controlled programmatically by the platform such that users are only able to access files they have approval for. The hosted data is available for search via the Data Browser feature. The Data Browser feature has both open and controlled datasets available for search. Users can select files from the hosted datasets to add to projects and then use them in analyses. The platform only lets users add files to projects if they are approved to access those files. In addition, once a raw file has been added to a project, users are only able to use those raw files in an analysis if they are approved for access.
Derived data: Derived data are the output files from running a bioinformatics tool or workflow. These files are stored in the projects where the analyses were run. All members of a project are able to access the derived data files within a project. The platform does not control a user’s ability to access derived data apart from who is a member of a given project.
Certified user: A user on the platform who is approved to access hosted controlled data.
Controlled project: Users can mark projects as “Controlled.” This is an additional protection which restricts project membership to only users who have access to controlled data on the platform. If users want to work with hosted controlled data, these files must be added to a project marked as
“Controlled.” Project membership will be limited to other users who also have access to any controlled dataset on the platform. Members of Controlled projects can see a list of all the files in that project, however they are only able to access raw files (use the file as an input in a tool or workflow) if they have appropriate access approval. All project members can access derived data.
Check data access permissions on BioData Catalyst
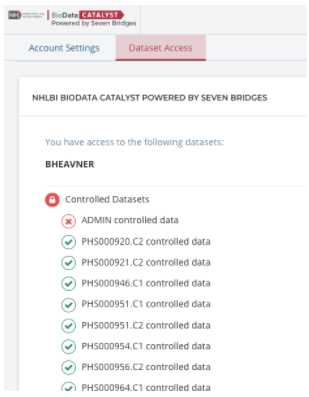
BioData Catalyst programmatically controls user permissions on the hosted controlled datasets like the TOPMed studies. To see which of the hosted datasets you are approved to access on BioData Catalyst, click on your username in the top right-hand corner of the platform. From the drop-down menu, select “Account Settings” and then select the tab for “Data Access.”
All of the hosted datasets on BioData Catalyst are shown and user permissions are shown with green check marks and red x’s. The datasets are referred to using their dbGaP phs numbers and consent codes. If you don’t see what you expect, please contact [email protected].
Apply for cloud credits
Users incur cloud costs on BioData Catalyst Powered by Seven Bridges for running computation and storing files (results files or uploaded files). To get started on the platform, you need to set up a payment mechanism to support your cloud costs. NHLBI offers users $500 in free pilot fund cloud credits to test out the system and get started.
Before proceeding with this tutorial, you should request pilot funding cloud credits on the BioData Catalyst website.
The Seven Bridges team will add the credits to your platform account and notify you when the credits are available for use (described in further detail in the next section).
Users can also pay for their own cloud costs. Please contact [email protected] if you would like to support your own cloud costs instead of applying for NHLBI cloud credits.
Create a project
Projects are workspaces that serve as the core building blocks of BioData Catalyst powered by Seven Bridges. Each project corresponds to a distinct scientific investigation and serves as a container for data, analysis workflows, and results. Multiple analyses can be carried out within a project.
Projects are secure and private. The project creator has the option to add collaborators to the project as project members. Each project has at least one administrator, who controls the project members' permissions to execute analyses. You can be a member of multiple projects each with different teams of researchers.
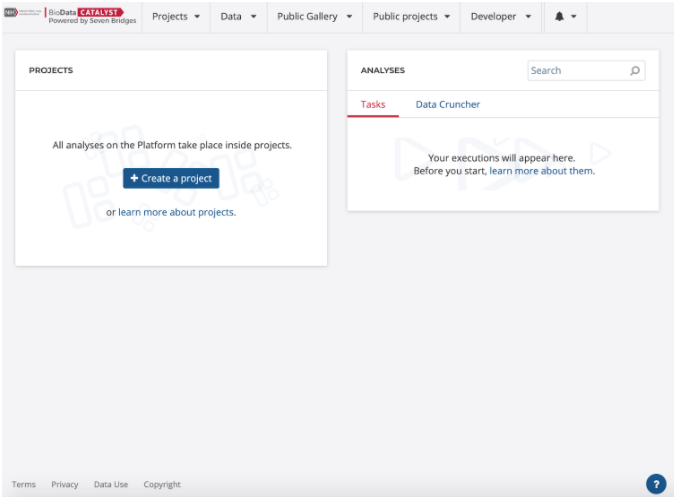
Create a project to learn more about configuration options. On the main dashboard, select “Create a project.”
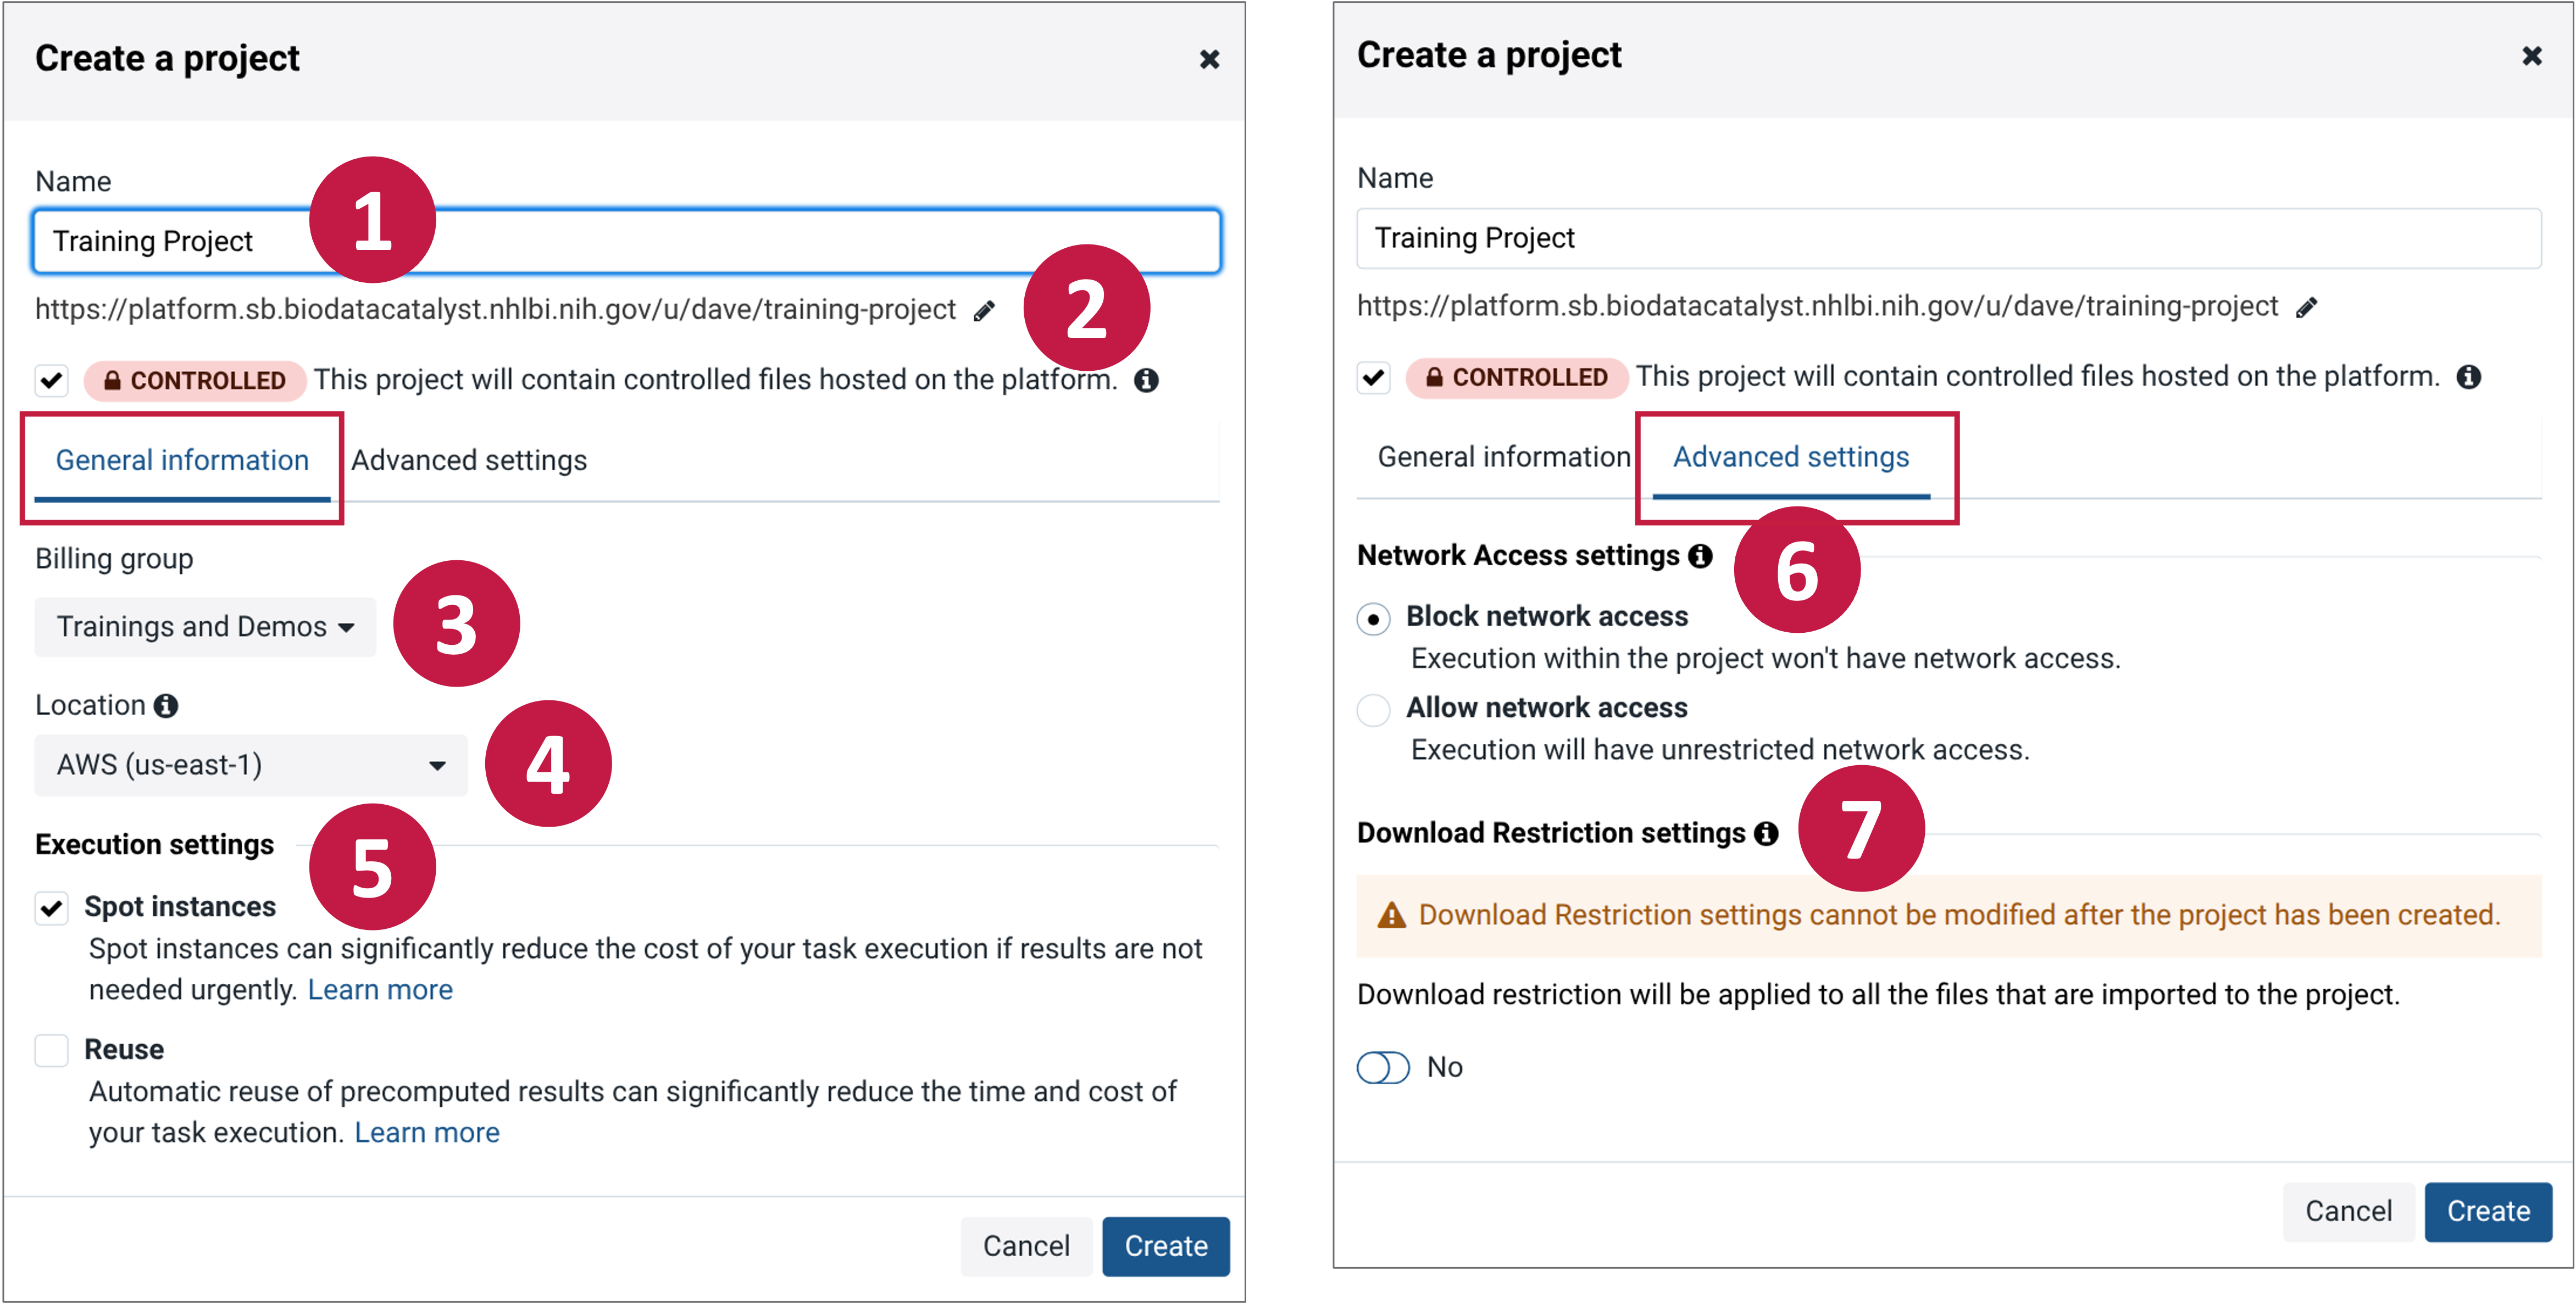
The "Create a project" pane has two tabs names "General information" and "Advanced settings".
1. Name the project
Following along with the red step indicators in the screenshot above, begin by picking a name for your project. Your project will be assigned a short name based on the name that you give it, which is used as an ID to refer to the project when using the API.
2. Controlled Projects
Projects can be set as either “Open” or “Controlled.”
Open Data Projects are designed to host both Open Data and your private data. Open Data is available to all the users on the Platform and consists of data which is not unique to an individual. Note that you cannot copy Controlled Data inside an Open Data Project.
Controlled projects help users protect hosted Controlled Data (like the TOPMed studies) by restricting access to other users who also have approval to work with one or more of the hosted controlled datasets. If users want to work with hosted controlled data from the Data Browser feature, then the user must add those controlled data files to a Controlled project. In addition, the project owner (and other admins) can only add new members to the project if those members also have access to Controlled data on the platform. Members of Controlled projects can see a list of all the files in that project, however they are only able to access raw files (use the file as an input in a tool or workflow) if they have appropriate access approval. All project members can access derived data.
For this example project, leave the box unchecked so that the project will be “Open.”
3. Billing group
Billing groups are used to track the costs associated with cloud storage and computation on the platform. Each project must be assigned a billing group. Each user starts with a “Pilot Funds” billing group.
To proceed with the steps in this tutorial, you need to request pilot funding cloud credits on the BioData Catalyst website.
The credits will be added to your Pilot Funds billing group and you will receive a notification when the credits are available for use. Once the credits are available, you will be able to run analyses in the project, as described in the section “Running Analyses.”
For this example project, select the Pilot Funds billing group.
4. Location
To enable users to compute on data where it lives, the platform offers the choice to perform computation on two different cloud locations (cloud provider and region): AWS us-east-1 and Google us-west-1. Users select one of these two cloud locations as the location for the project. All computation within the project will take place on this cloud location, and any resulting files from analyses will be stored on this cloud location.
While users can set up analyses with input files from any cloud location, if the input files are stored on a different cloud location than the one set for the project, data egress will occur. Typically, it is most efficient to select the cloud location based on where a majority of the input files are stored. More information can be found in this blog post.
For this example project, select AWS-us-east-1 as the cloud location.
5. Execution Settings
The first selection in the Execution Settings is whether to use a discounted type of computation instance on AWS or Google Cloud, which uses the cloud provider’s spare capacity. For AWS, the platform supports EC2 Spot instances. With Spot instances, you pay the Spot price that is in effect for the time period your instances are running. Spot instance prices are set by Amazon EC2 and adjust gradually based on trends in supply and demand. Spot Instances are available at up to a 90% discount compared to On-Demand prices. For Google, the platform supports Preemptible instances. They offer the same machine types and options as regular compute instances and last for up to 24 hours. Pricing is fixed so you will always get low cost and financial predictability, without taking the risk of gambling on variable market pricing. Preemptible instances are up to 80% cheaper than regular instances.
Both AWS and Google may terminate these instances at any time if they require access to those resources due to high demand. The job(s) running on the instance at the time of termination will be interrupted and have to be run again from the beginning. The jobs will be automatically restarted on an equivalent regular On-Demand instance. Restarting jobs on another instance will inevitably prolong execution time and add to the cost. Therefore, these instances are not recommended for running long, time-critical jobs.
For this example project, turn on AWS Spot instances.
The next selection for Execution Settings is whether to use memoization when running analyses. Memoization allows researchers and bioinformaticians to restart from a point of failure in a workflow by enabling the reuse of existing outputs, and you can read more about it on the Seven Bridges blog.
For this example project, leave memoization in the default “off” setting.
6. Network Access
In "Advanced settings" Network Access can be set to either “Block network access” or “Allow network access.”
Network access control is a security feature, enabling researchers to define a more restrictive network access policy per project. This feature defines the network access permissions for Tasks and Data Cruncher analyses, thus ensuring even higher security and compliance standards in the execution environment. Project Administrators have the option to allow network access by exception for a chosen Project (via the visual interface or the API). The setting can be changed later in Project Settings.
For this example project, select “Block network access.”
7. Download Restriction Settings
In "Advanced settings" download restrictions can be applied to the project. Once download restrictions are applied to a project they cannot be reverted. To learn more about the functionality within this setting please see the Restrict file downloads page.
For this example project, do not apply download restrictions.
Running analyses
Single executions of bioinformatics tools and workflows on the platform are called “Tasks.” All Tasks are run from within projects. We will set up an example Task using the FastQC workflow.
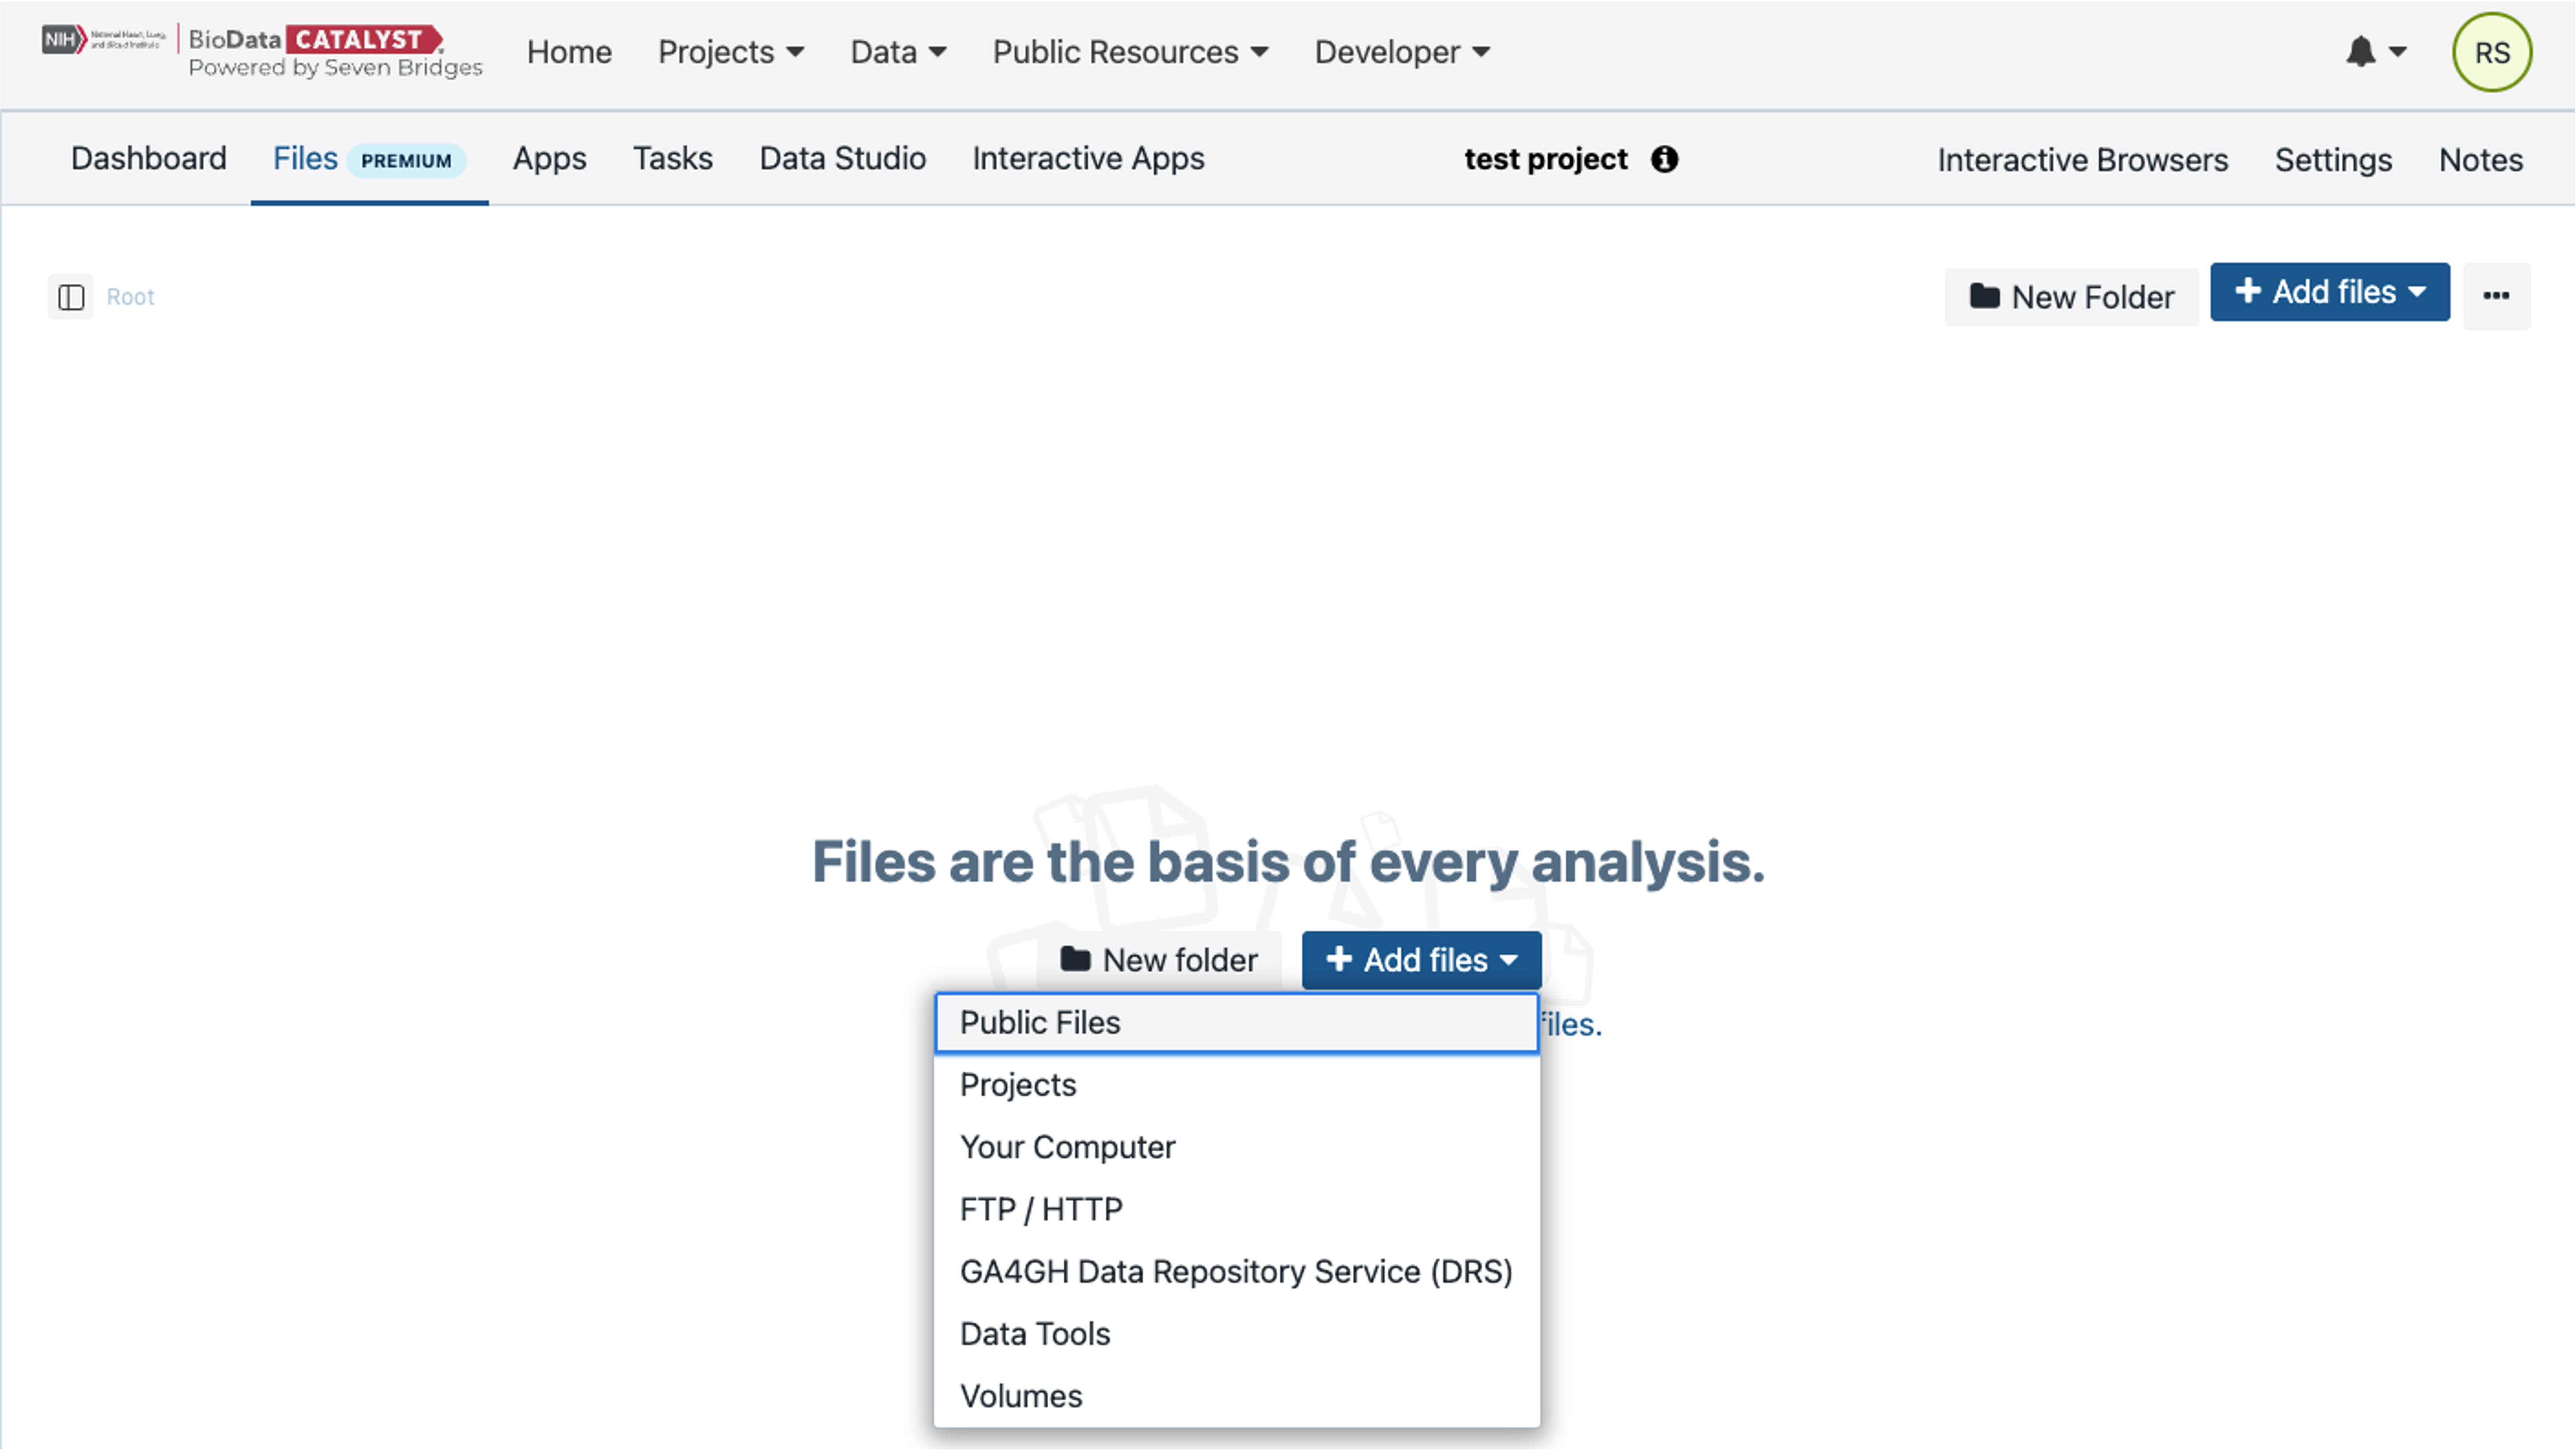
Start by adding files to the project. Go to the Files tab at the top and then select “Add Files.” This will bring up a drop-down menu where you will select “Public Files.” These are open access files that Seven Bridges makes available on the Platform.
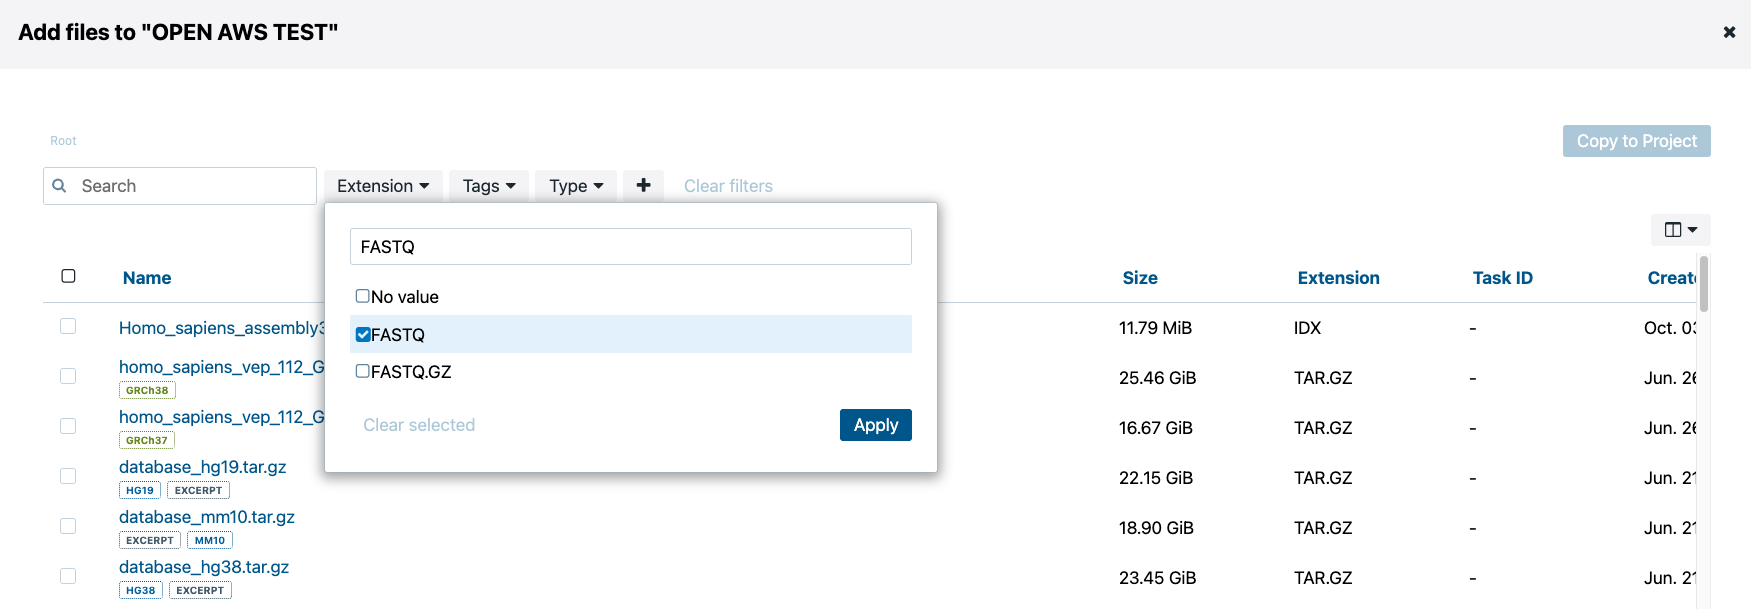
For this example Task, let’s search for FASTQ files. Using the “Extension” category, check the box next to “FASTQ” to filter for only FASTQ files within the Public Files.
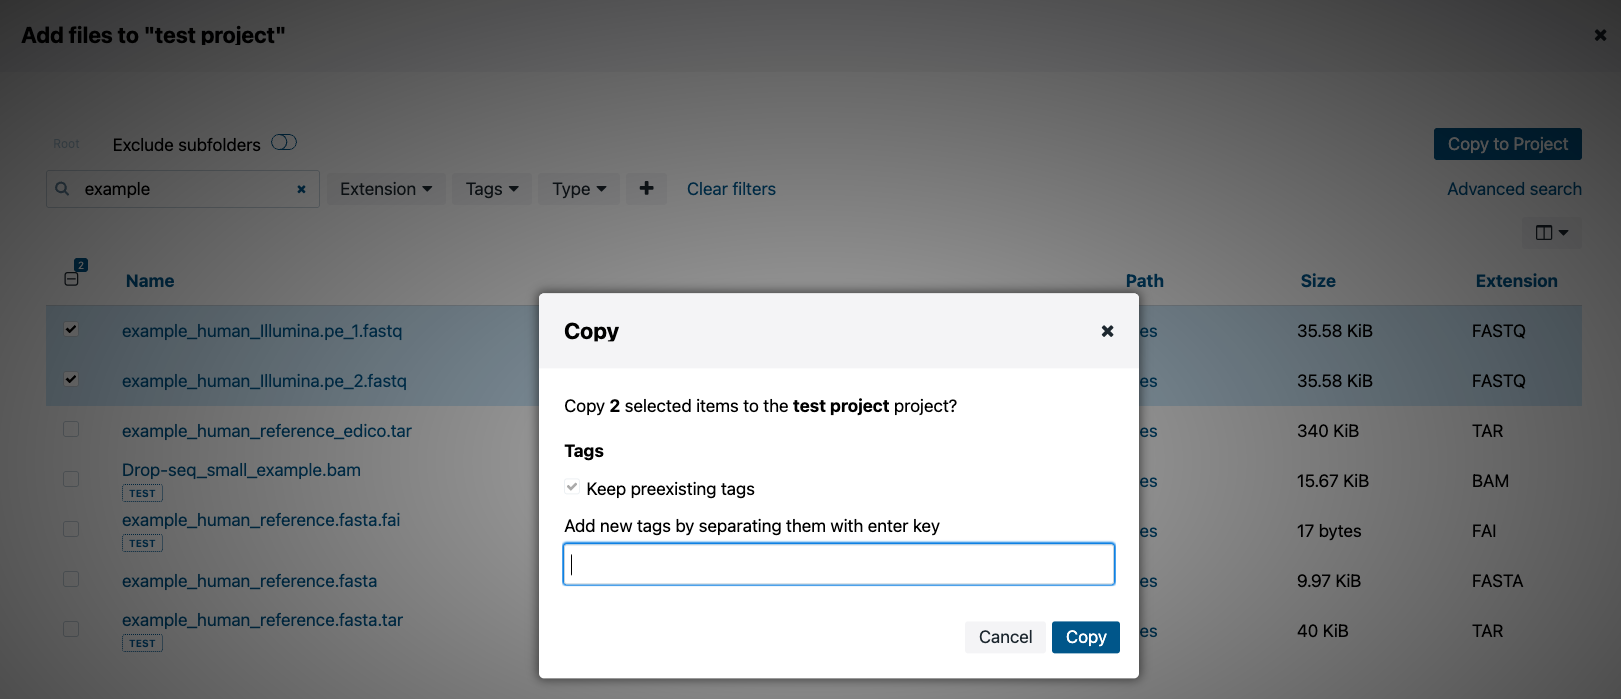
Now search for “example_human_Illumina.pe_1.fastq” and “example_human_Illumina.pe_2.fastq” in the search box. Check boxes next to both files and click the blue “Copy to project” button in the upper right corner.

A small box will pop up giving you the option to add tags to these files. Simply click “Copy.” Now these files have been added to your project. These are soft links to the files in the Seven Bridges storage so you do not accrue any cost for having them in your project.
Now you will add an App to the project. Select the Apps tab in the top navigation bar. Then click the “Add app” button (red arrow). Apps is the Platform term for tools and workflows.

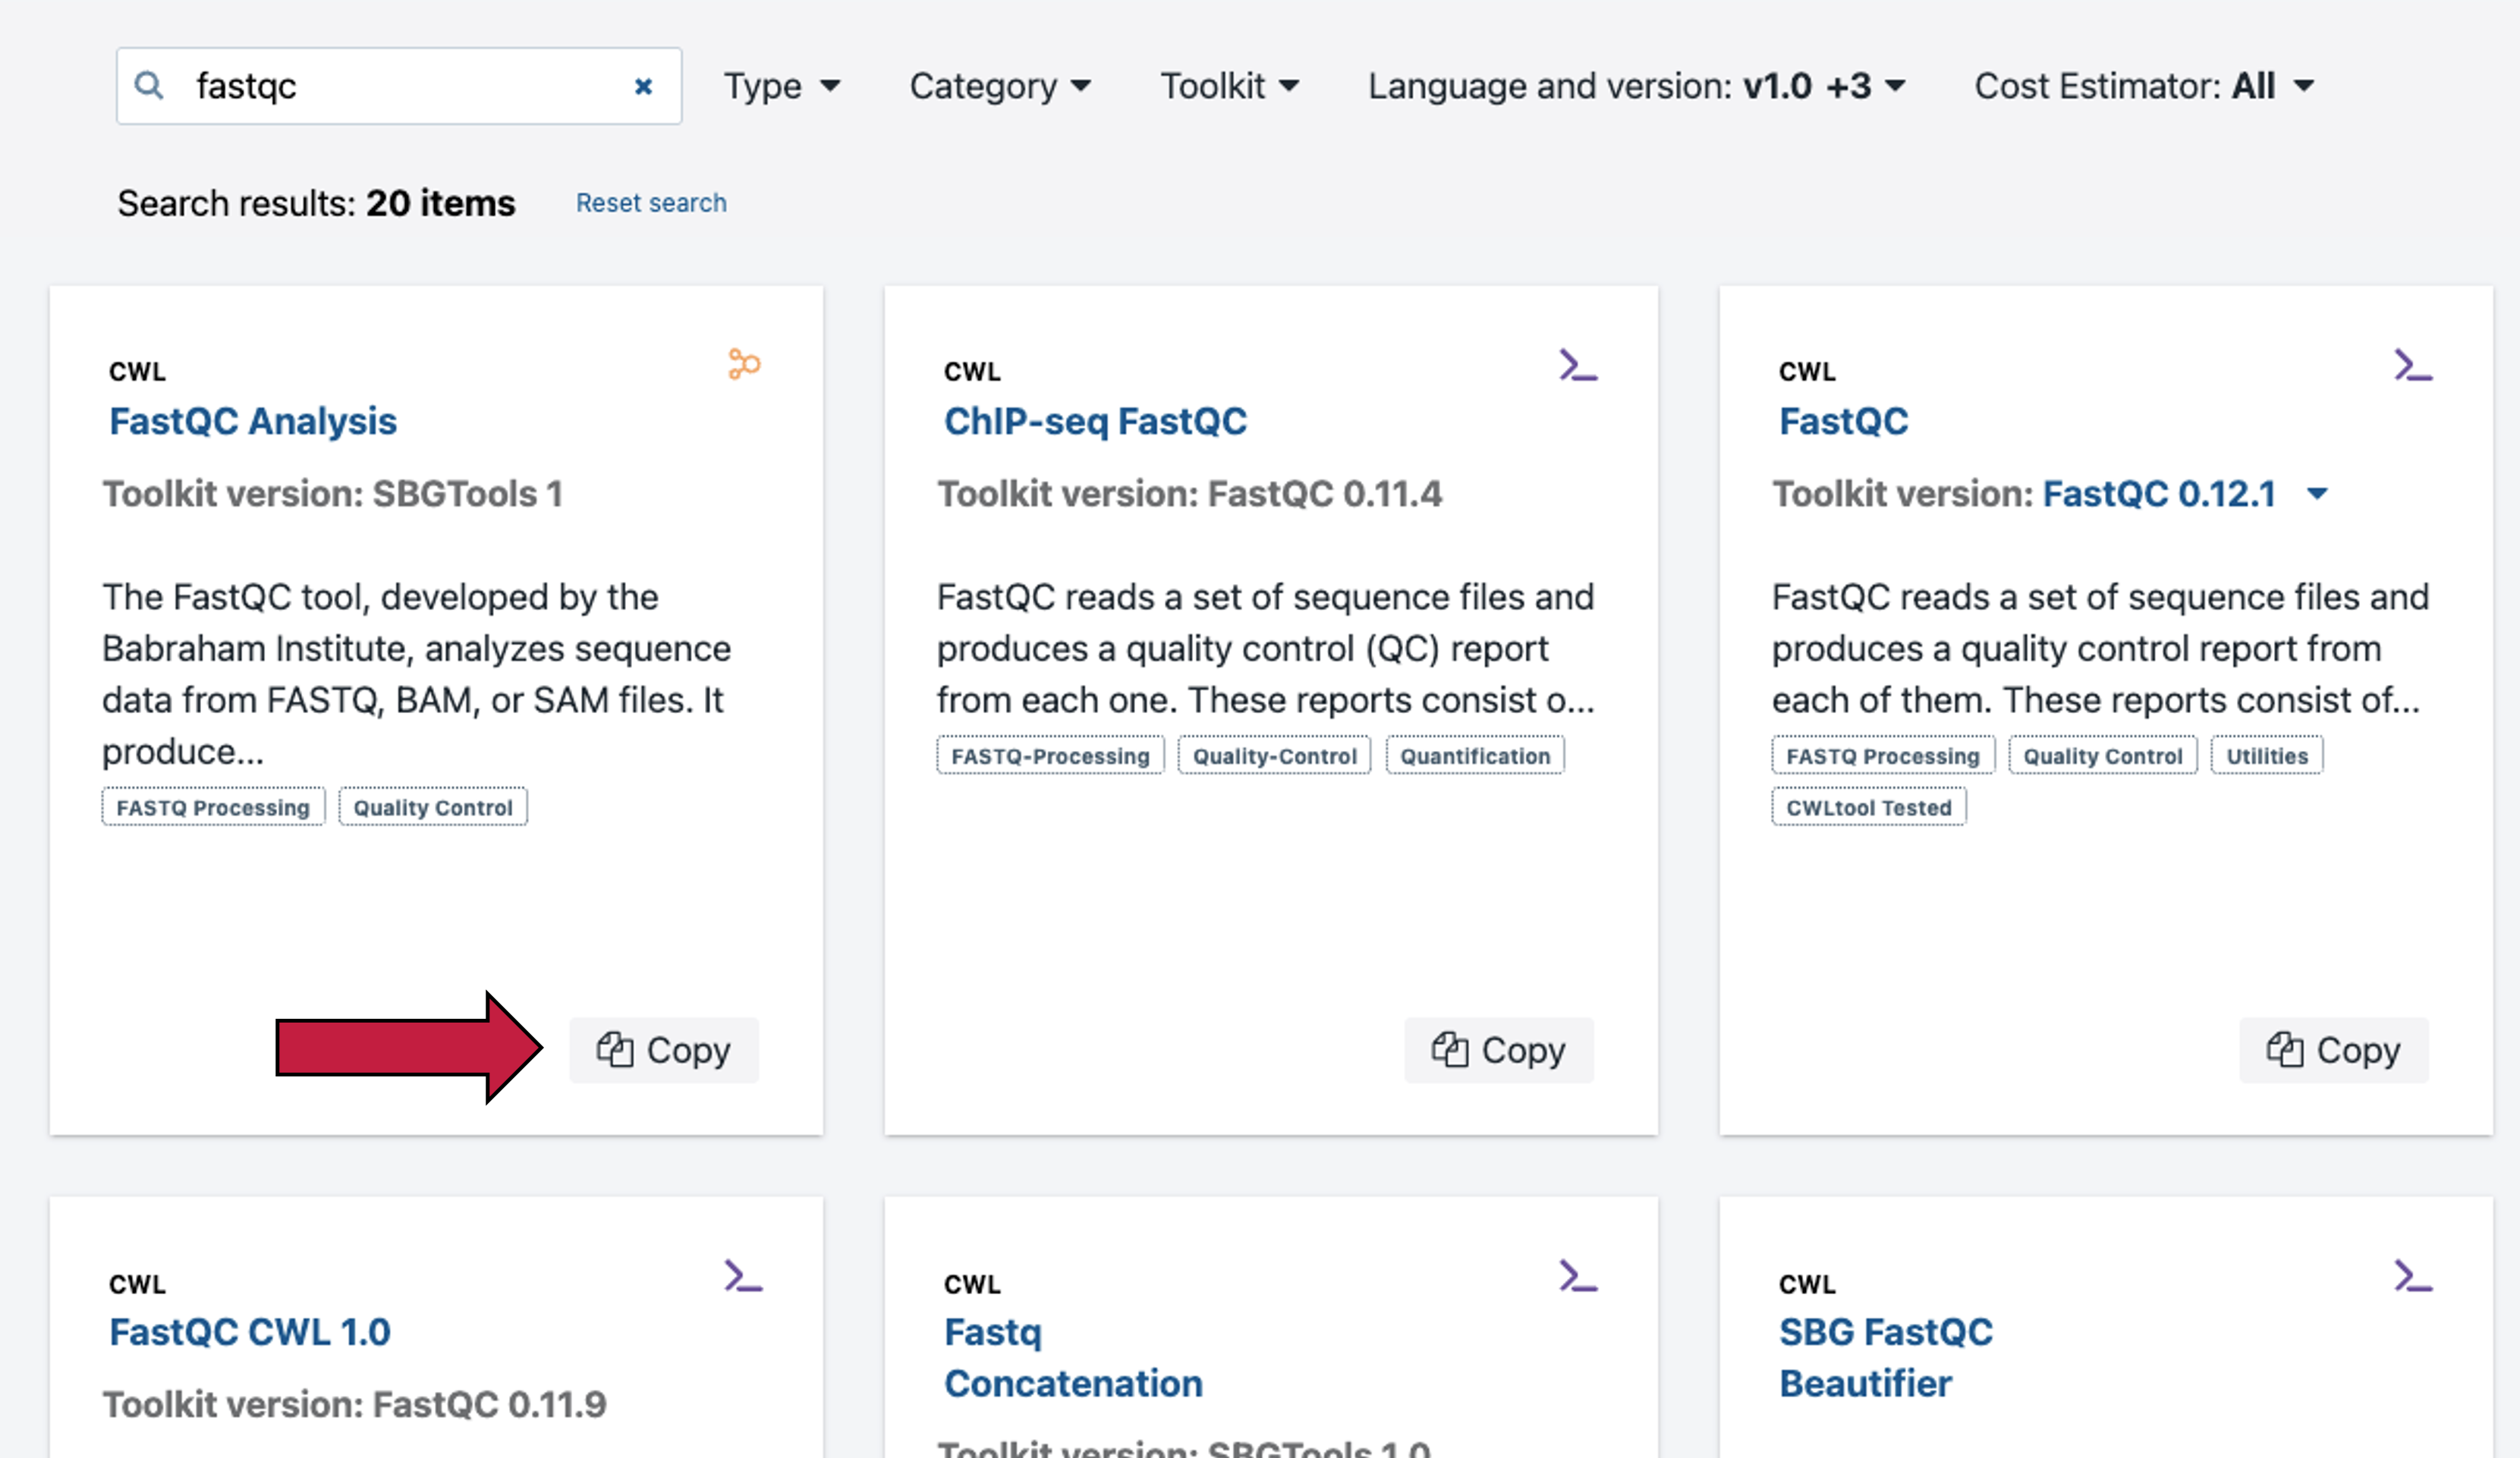
Users have the option to run hundreds of hosted tools and workflows that can be found under the “Public Apps” tab. Tools are denoted with a black “>_” terminal/command-line icon and workflows are denoted with an orange icon with three connected circles. All tools and workflows are in the Common Workflow Language (CWL) which is both human and machine-readable and has all the necessary information to run the tool in a reproducible way (see blog post). Users also have the option to bring their own tools and workflows to the platform using Docker and our Software Development Kit (SDK). Please reach out to the Seven Bridges team if this is of interest to you.
Search for the FastQC workflow in the Public Apps and then select to “Copy” this workflow to your project. Please note: when you select the “Copy” button shown above by the red arrow, the workflow will copy to your project, and a banner notification appears to confirm. If an App already exists in the destination project the URL will be displayed prompting the user to rename the App, and a second row of buttons appears prompting you to “cancel” or “copy”. Select the “x” in the top right corner to go back to the Apps tab of the project.
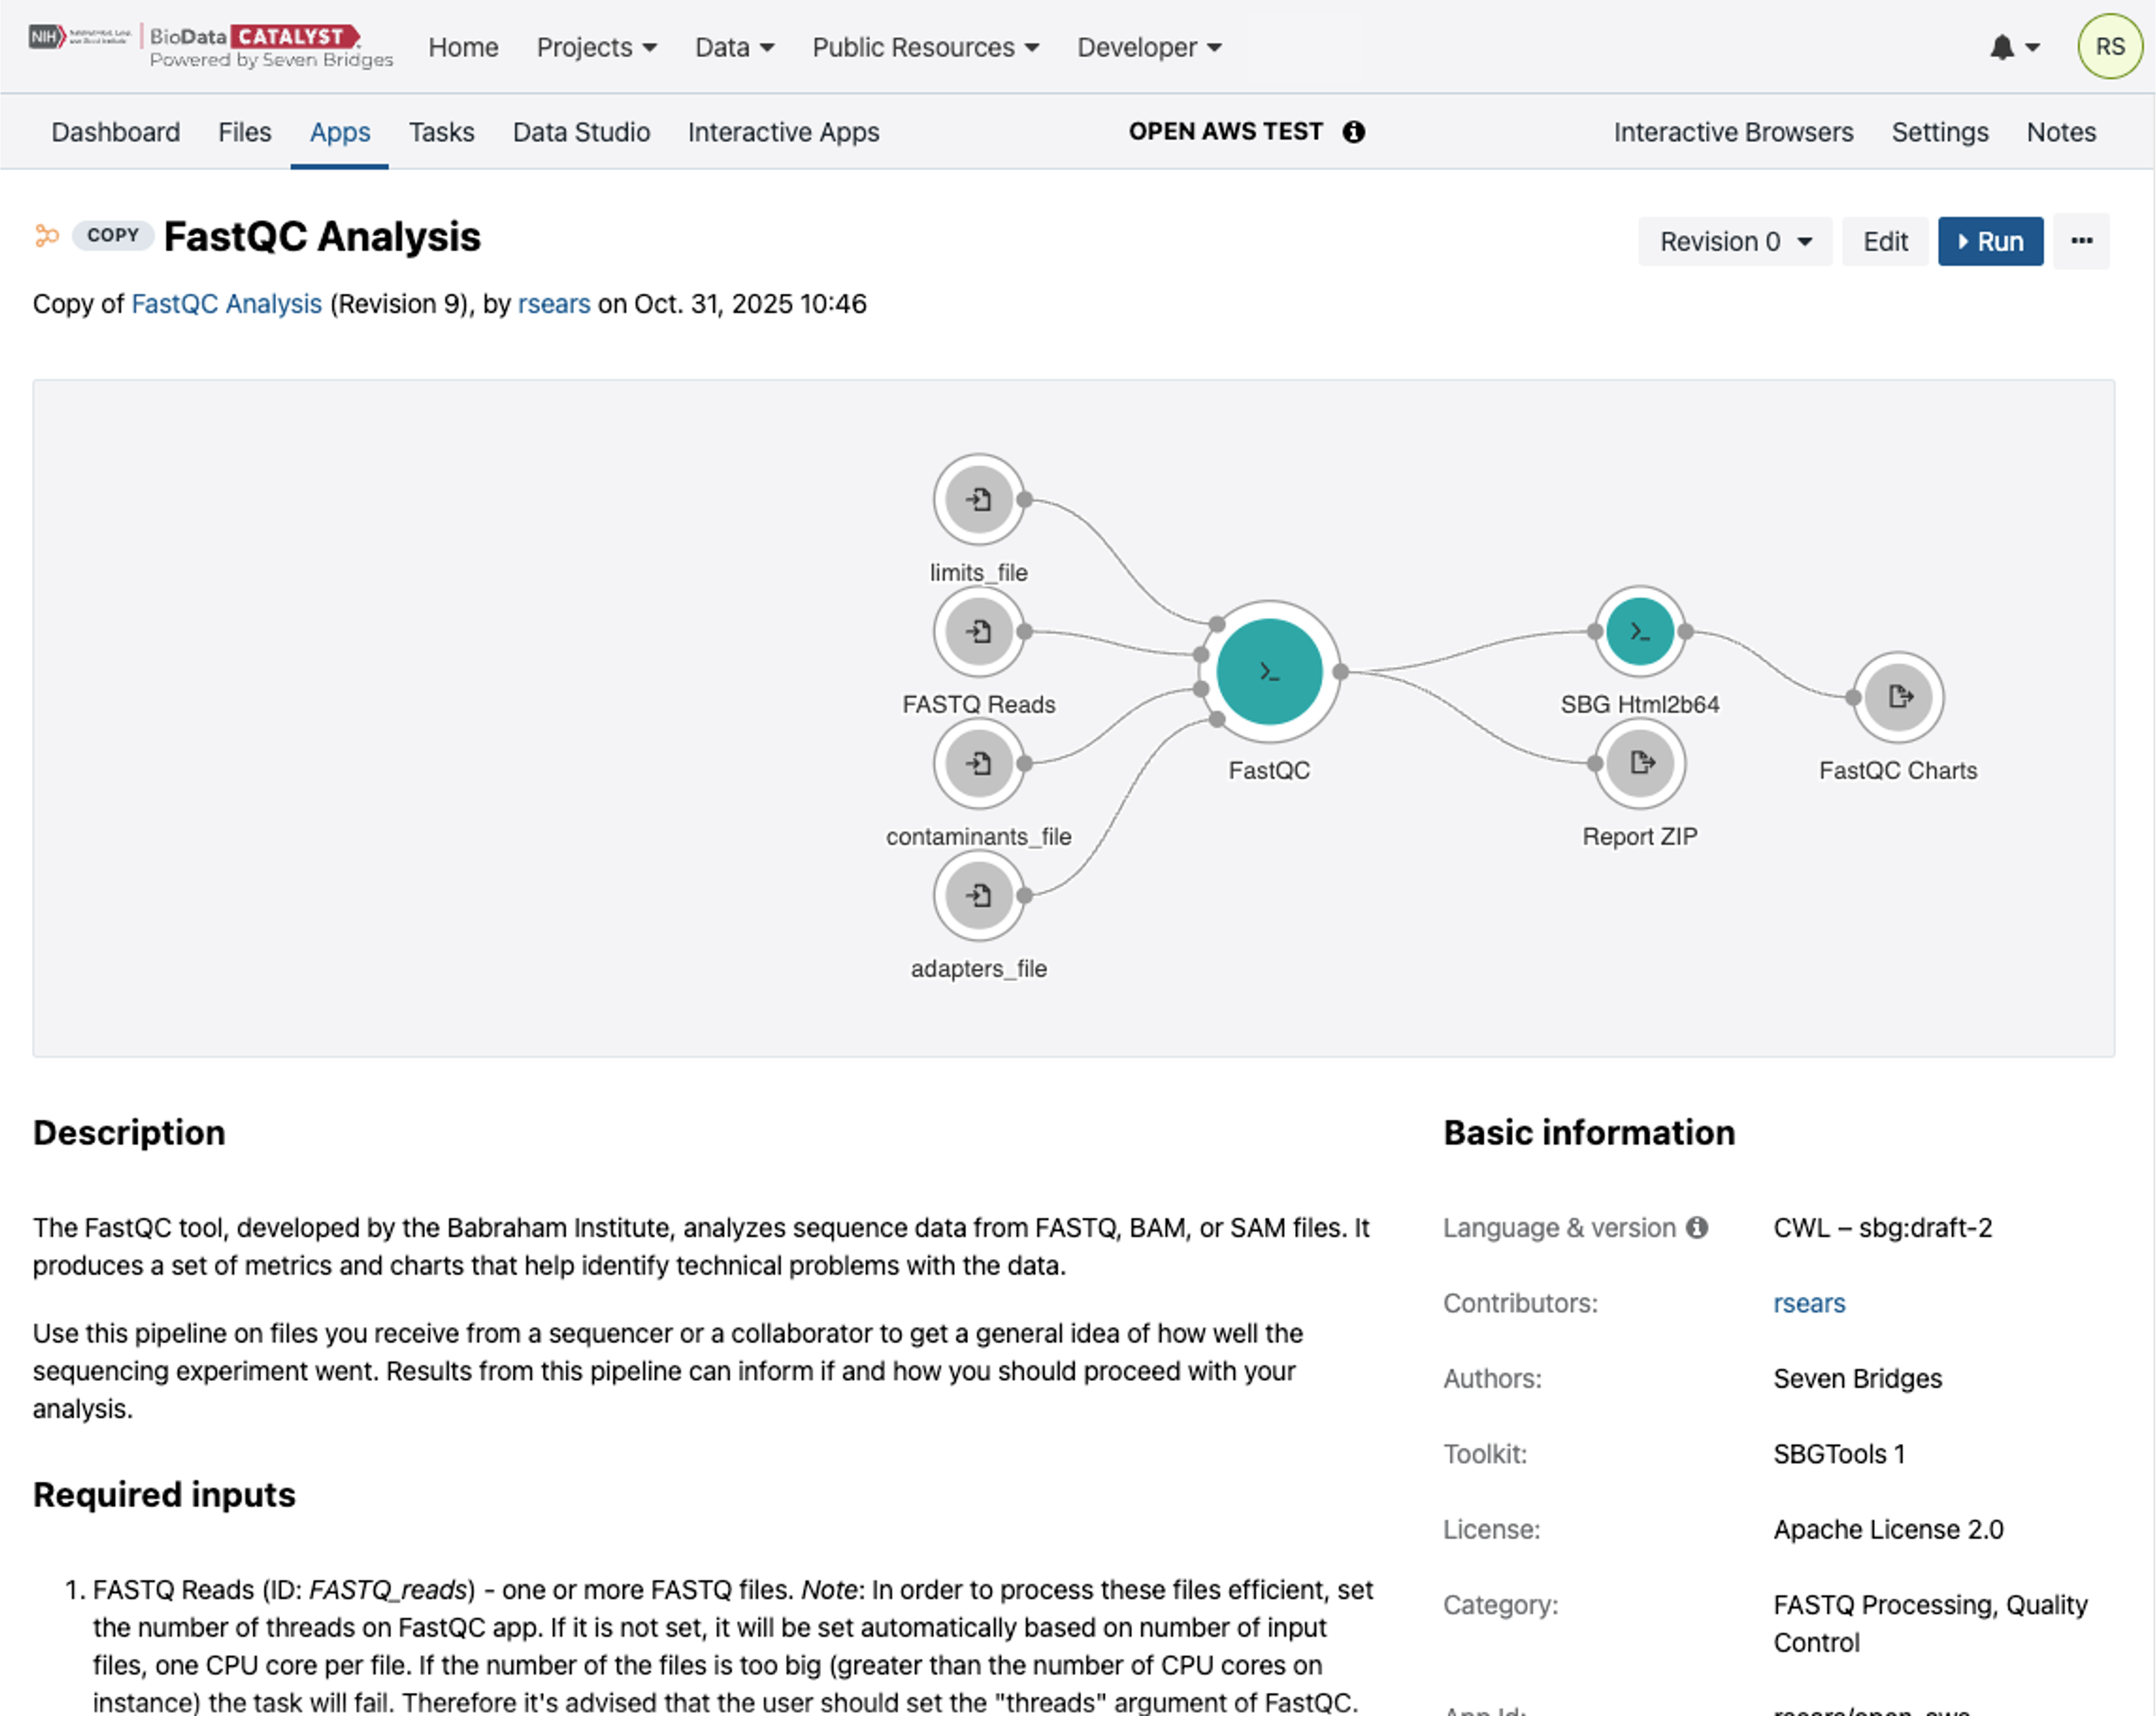
Each of the hosted tools and workflows in the Public Apps has a description along with helpful information like the required inputs, outputs, and common issues (see below).
To set up the draft Task, select “Run” on the App from the Apps tab.

This will bring up the draft Task page.
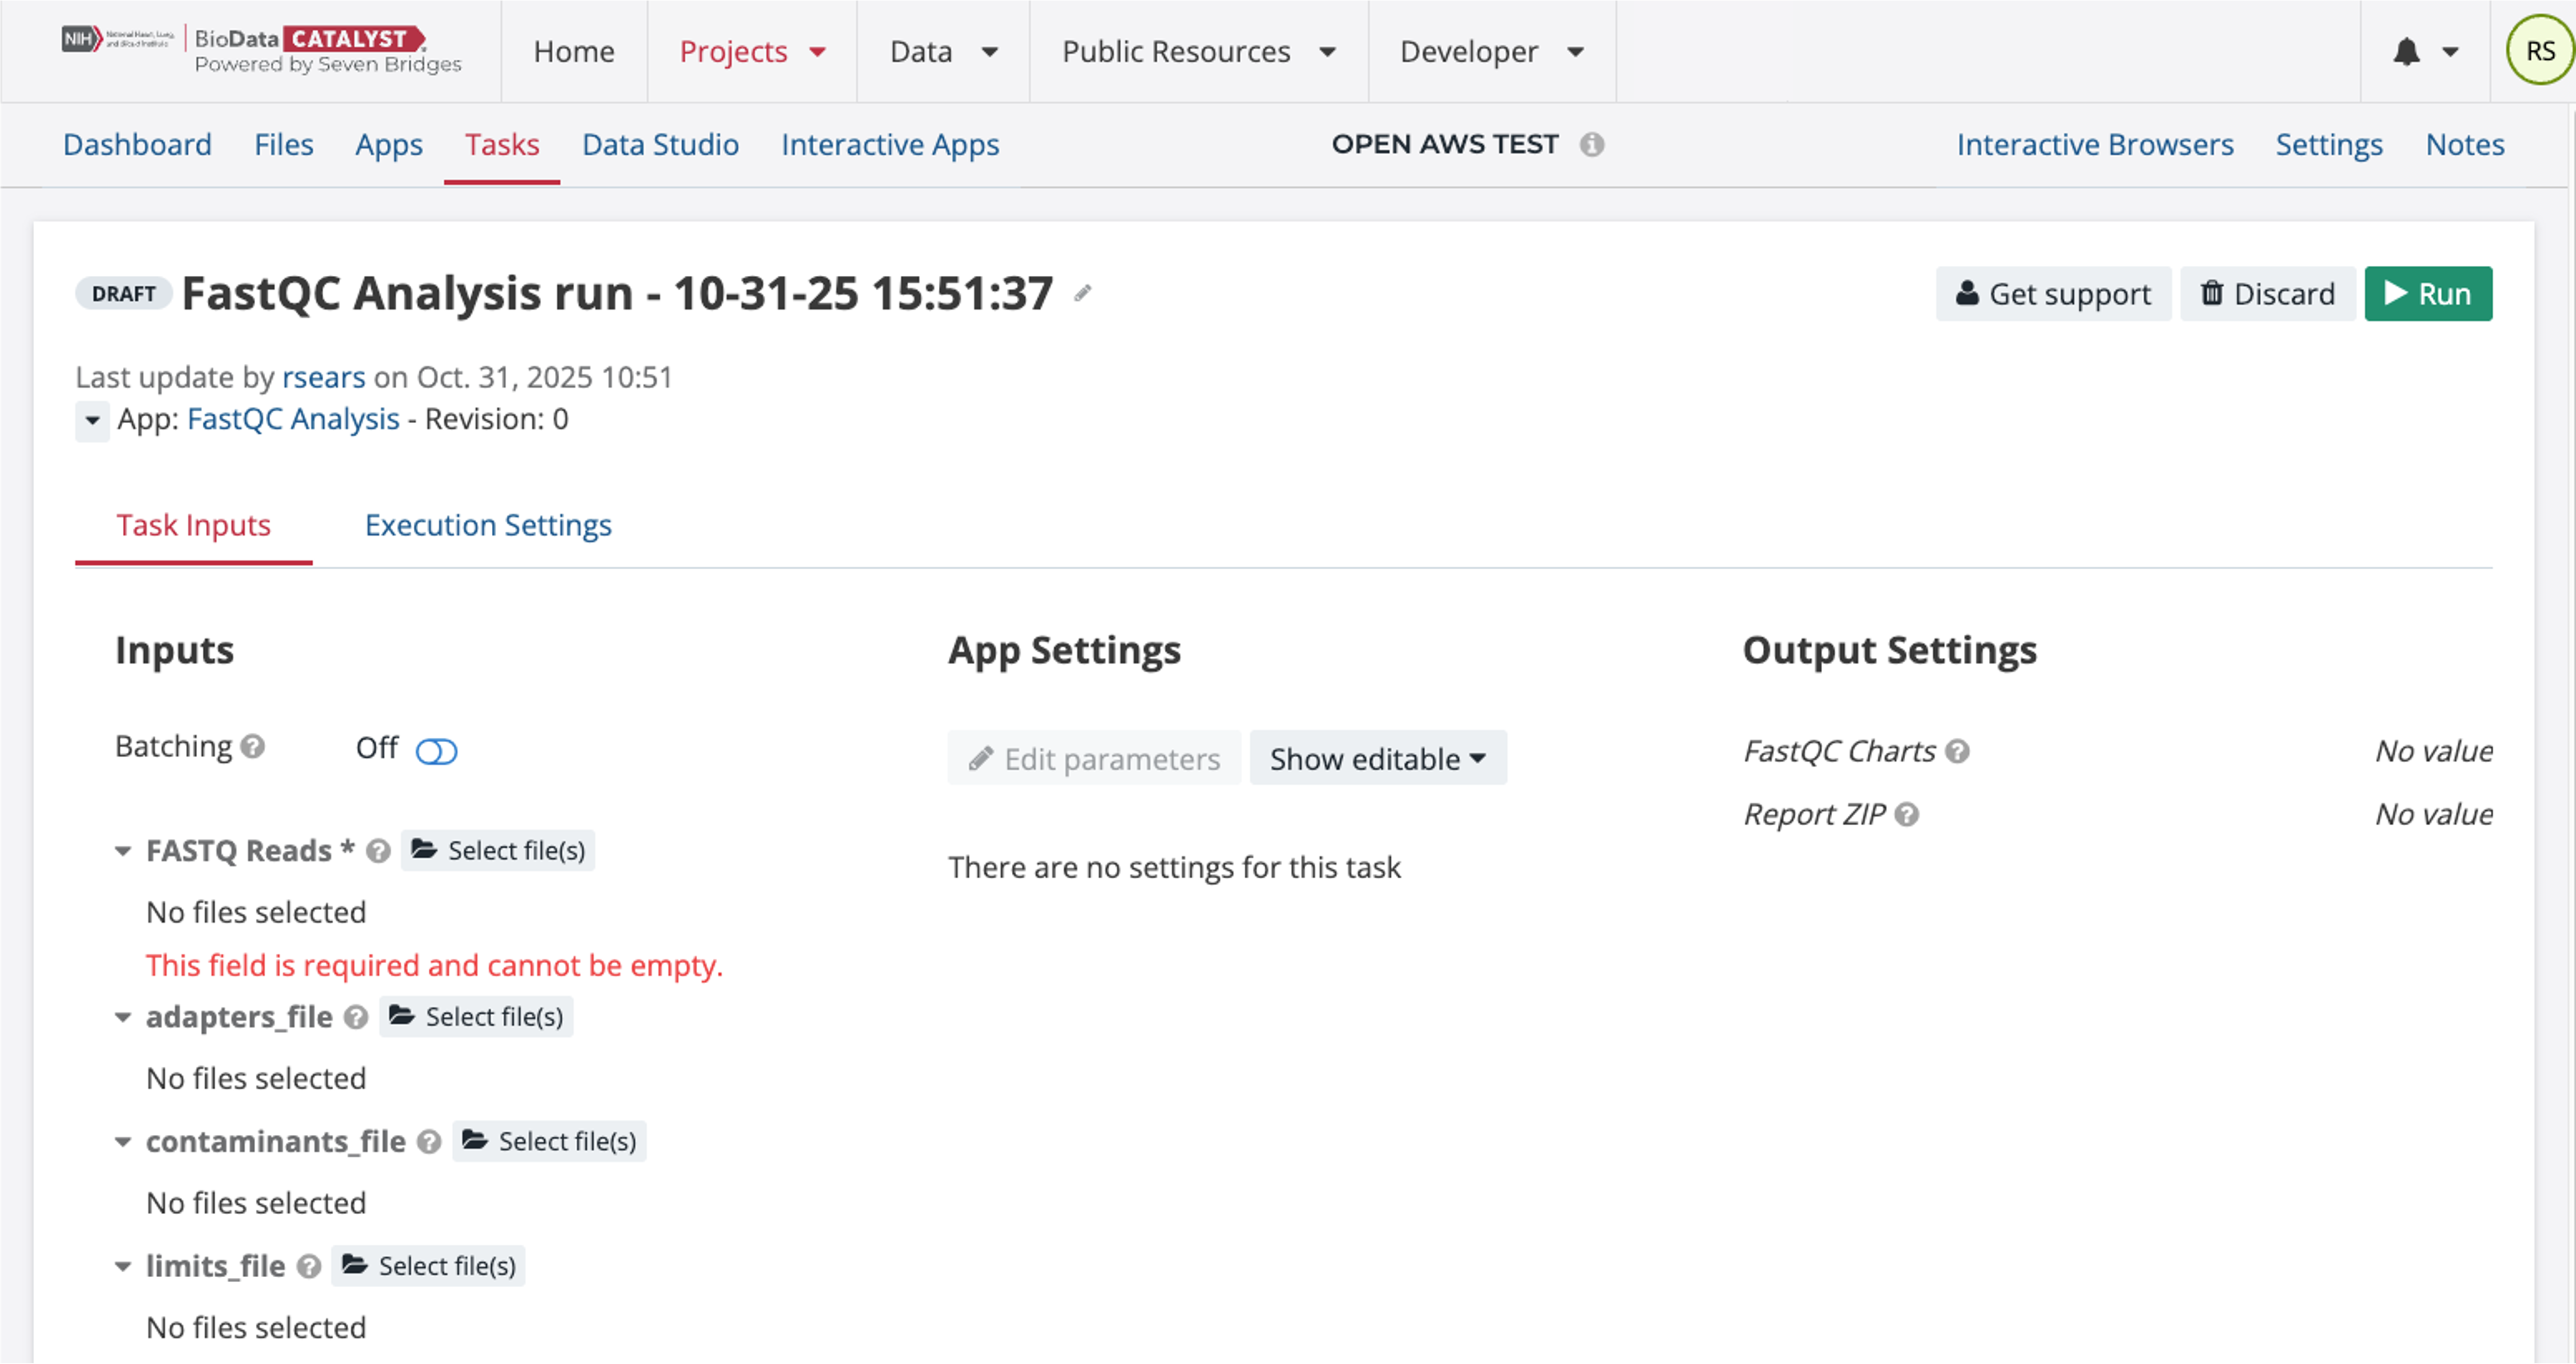
Under the FASTQ Reads, click on the icon for “select files.” This will bring up the page below where you can select from files in your project.

Select the two FASTQ files and then click the button “Save Selection.” Only the FASTQ files are required for this workflow to run and the App Settings do not need to be modified. To start the Task, click “Run.” This will queue up the Task to run.
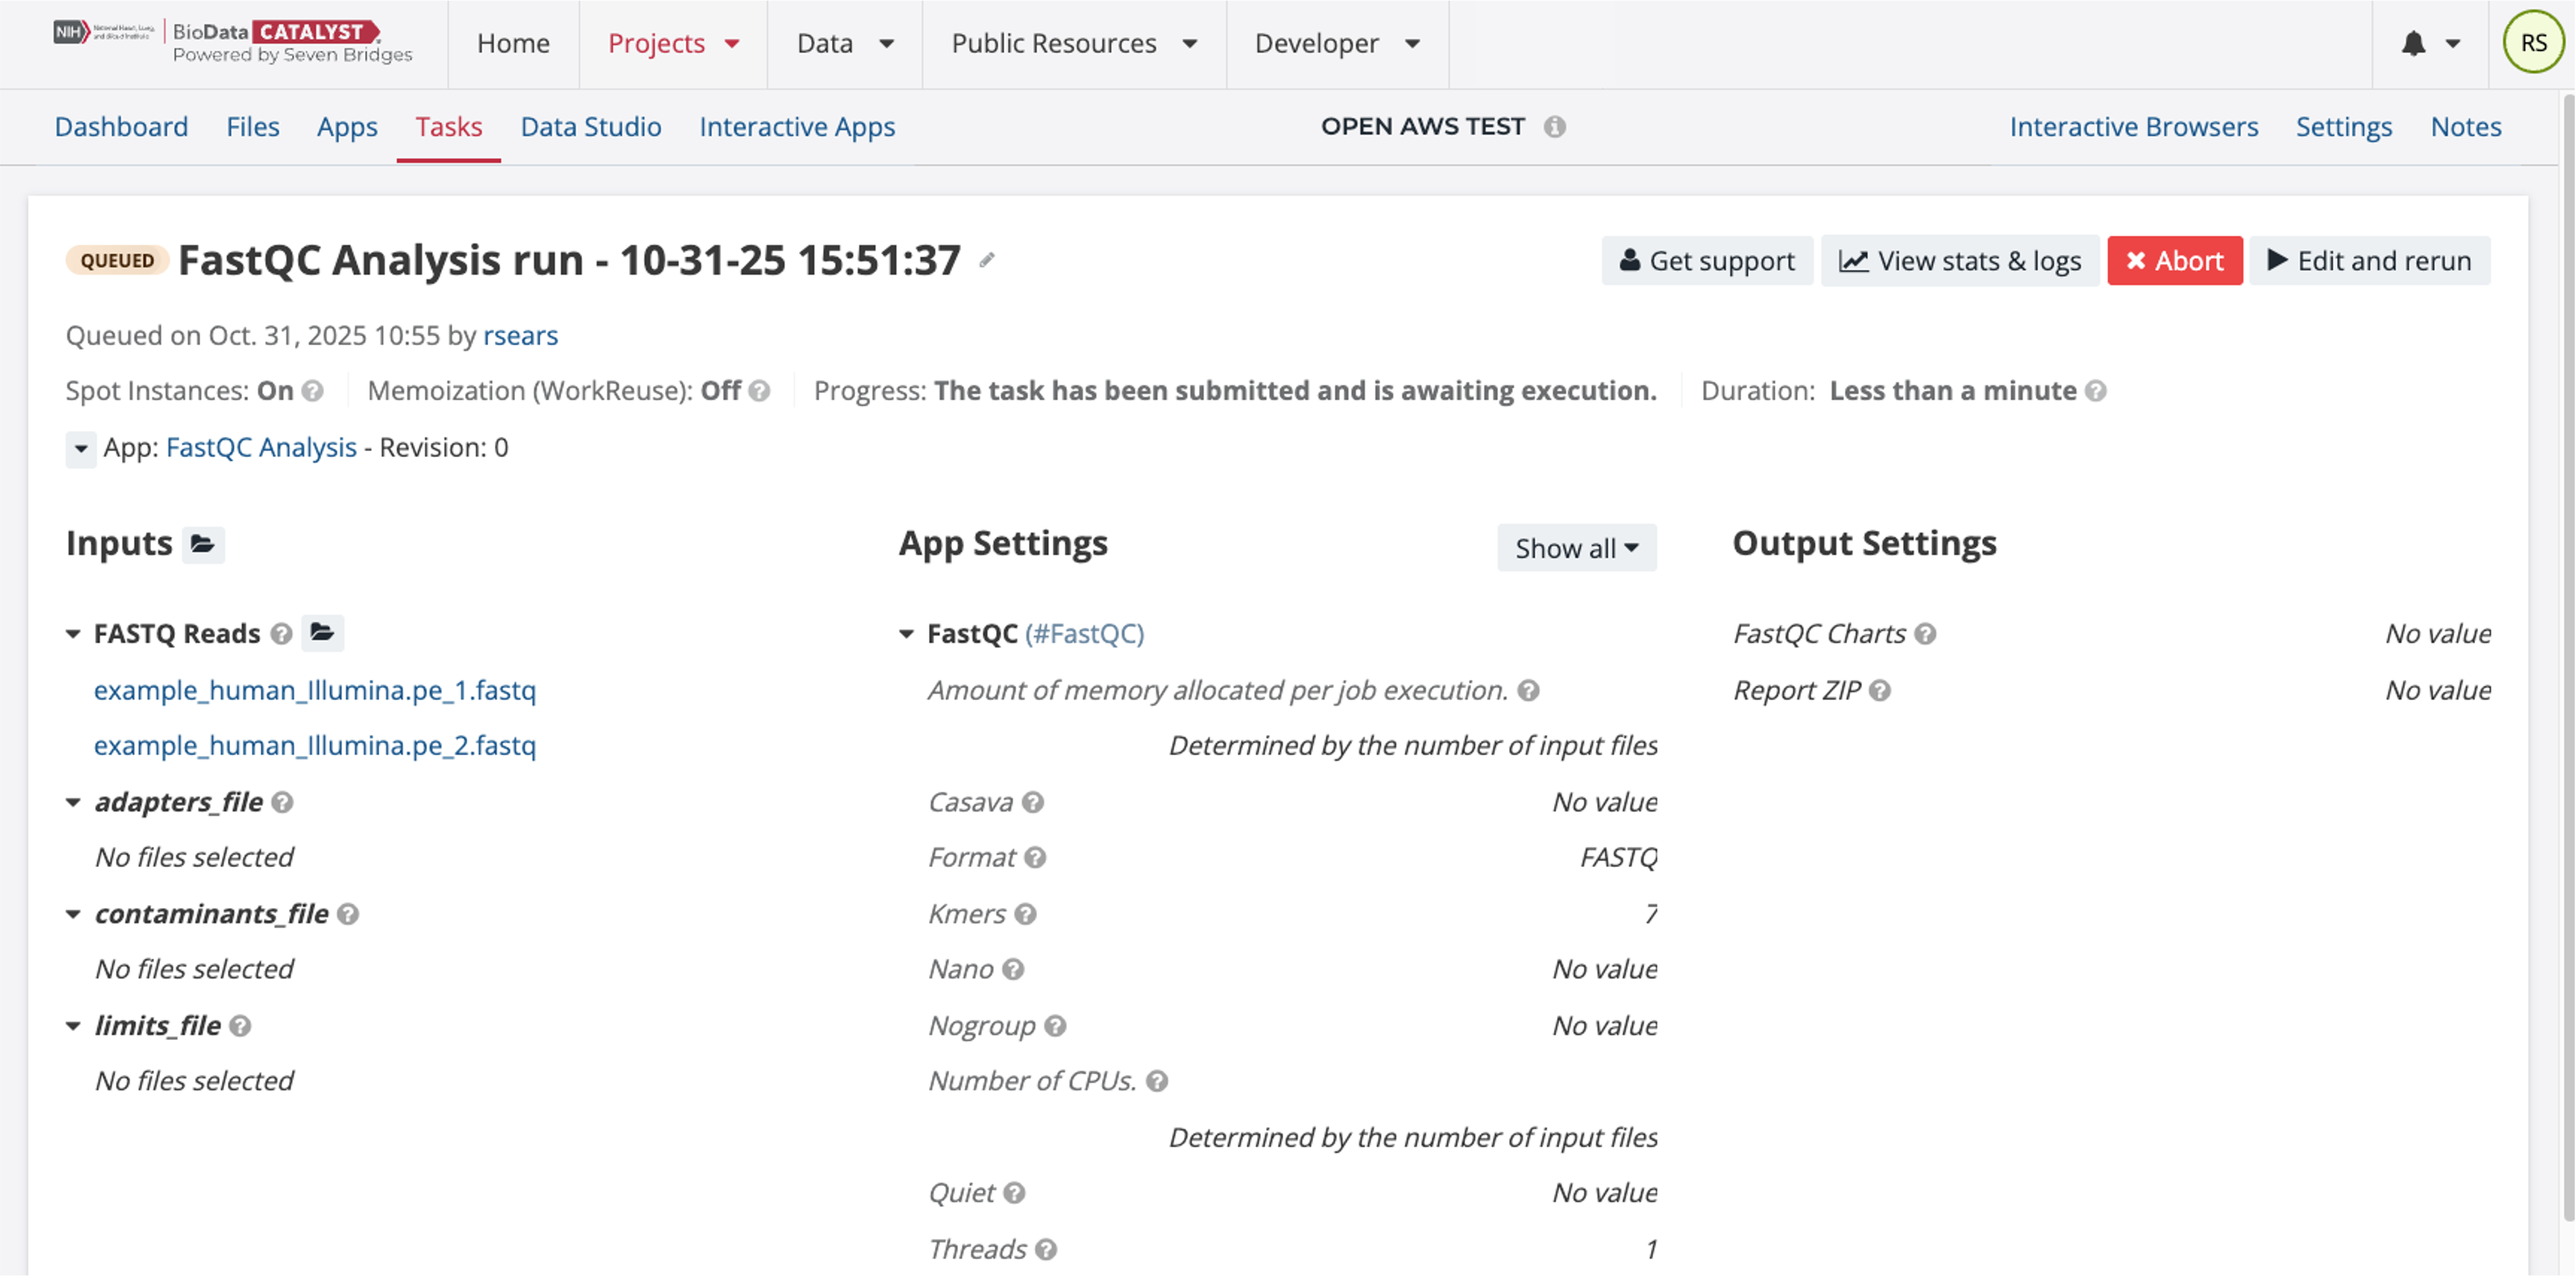
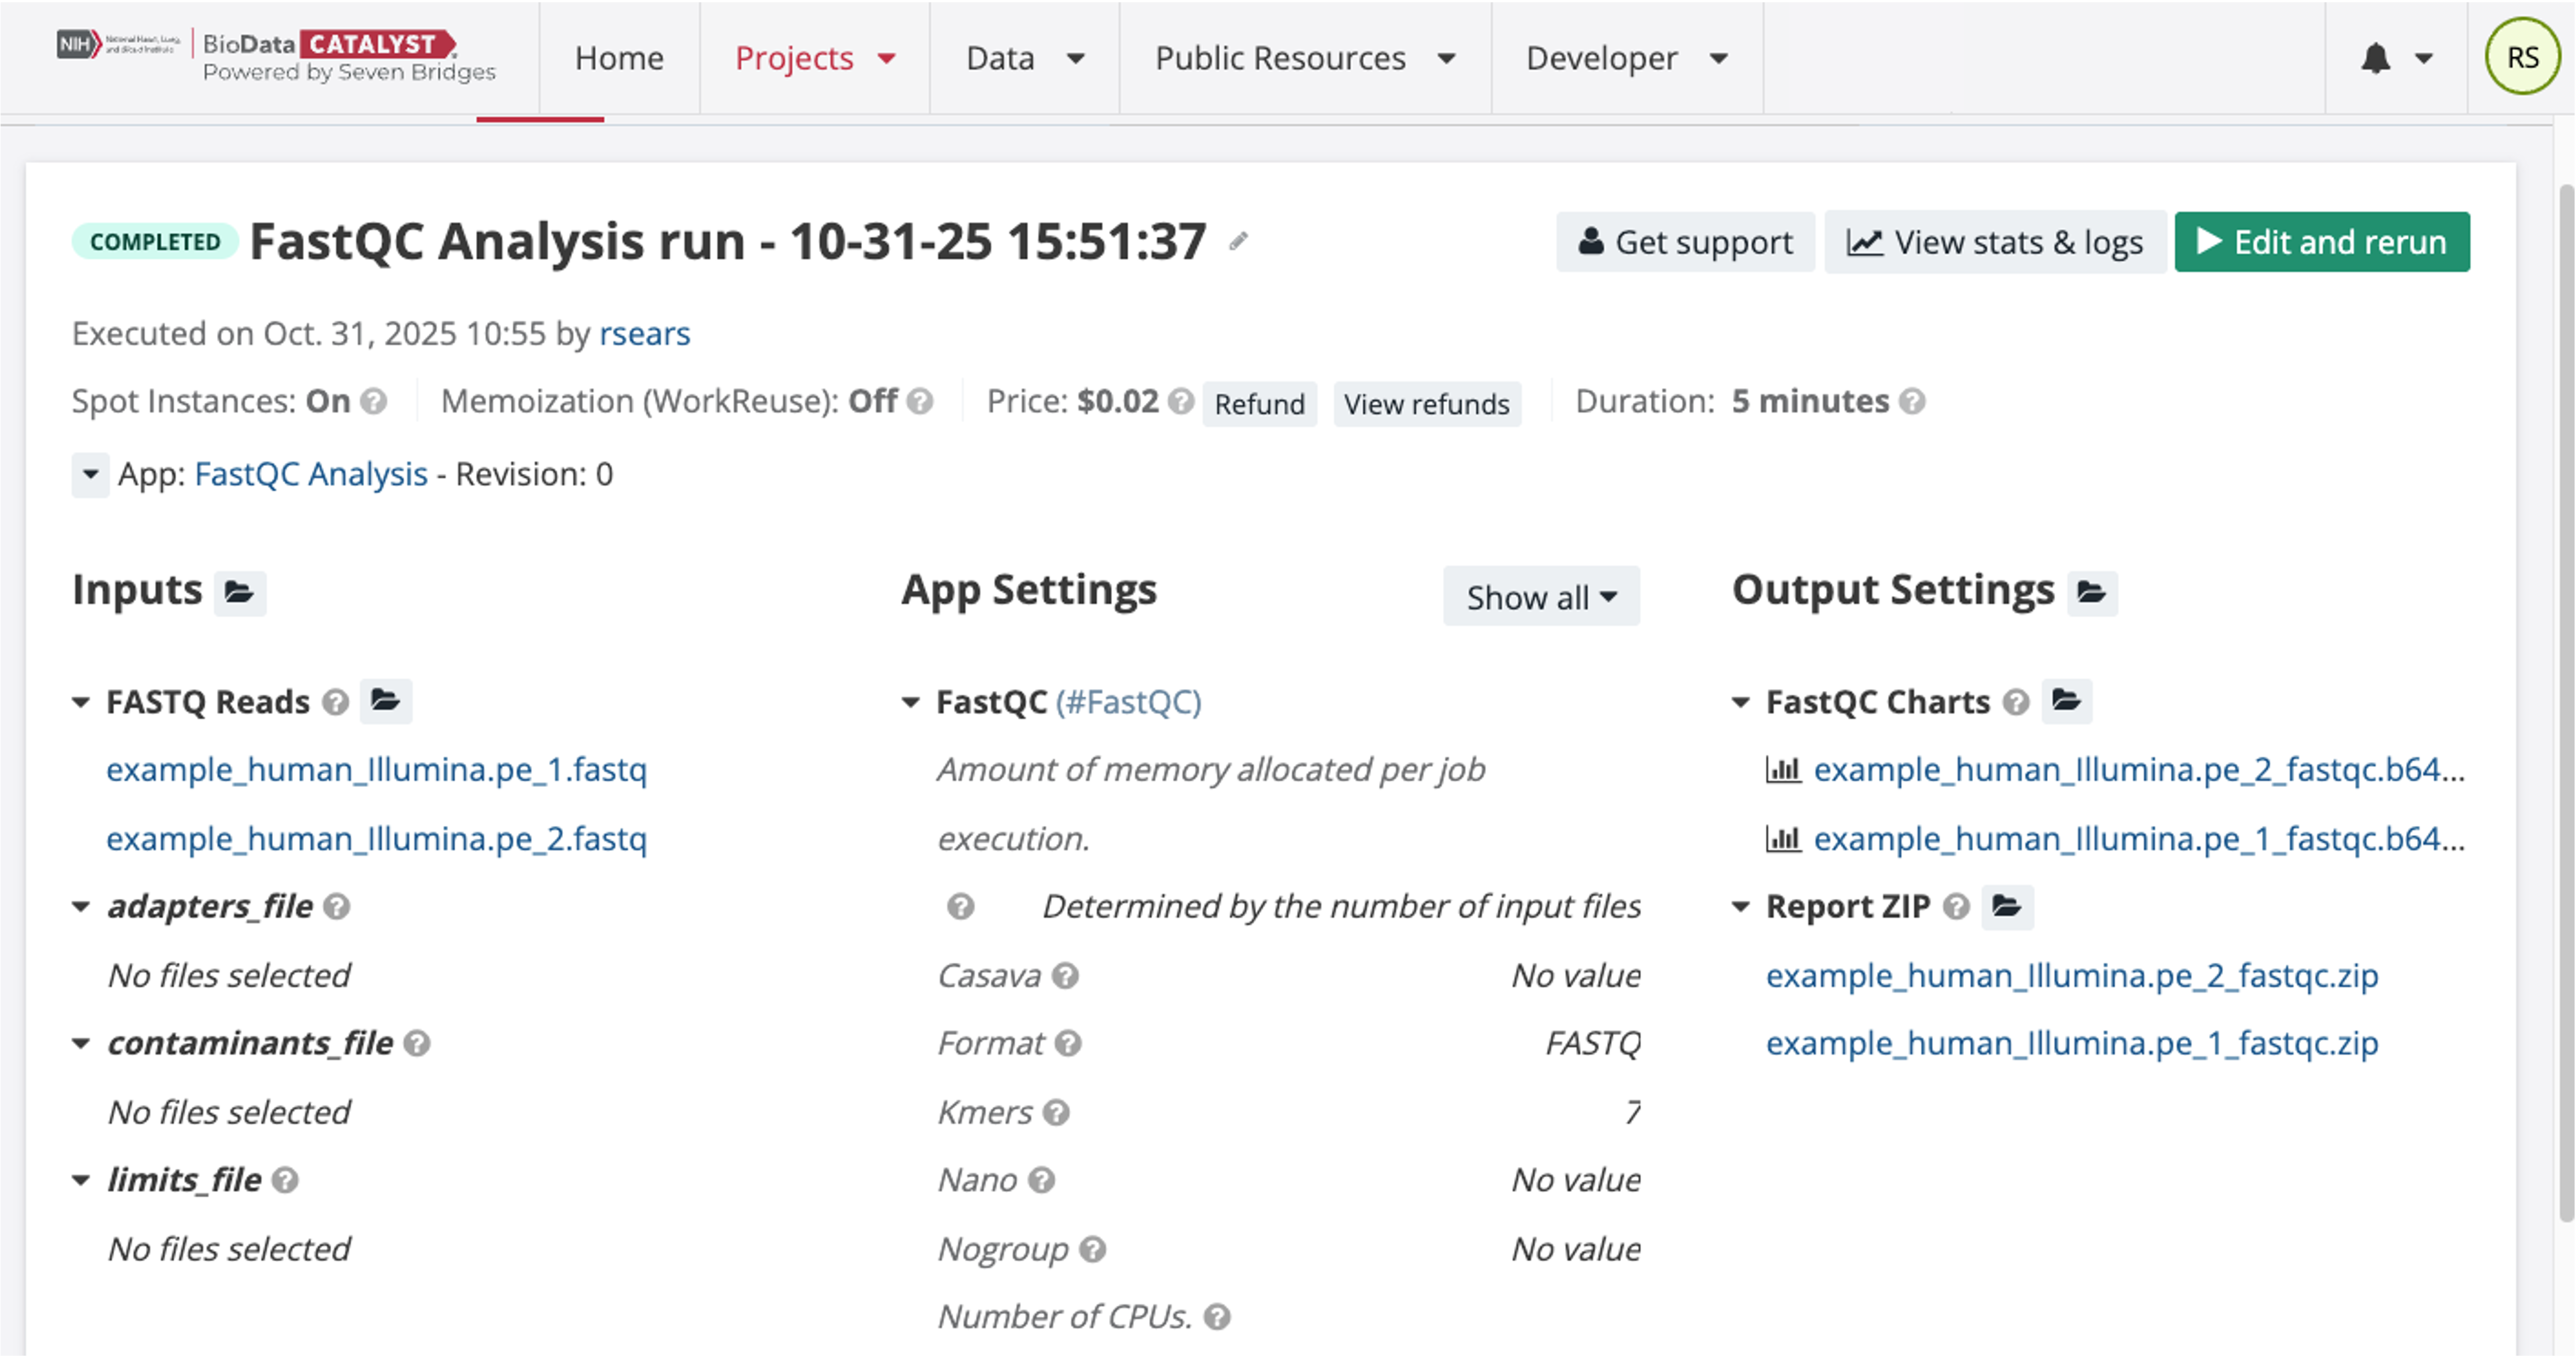
The completed Task and output file links are shown below. The user can see the price, duration of the run, and access the output files. These completed Task pages remain available on the platform indefinitely.
Search and access hosted studies
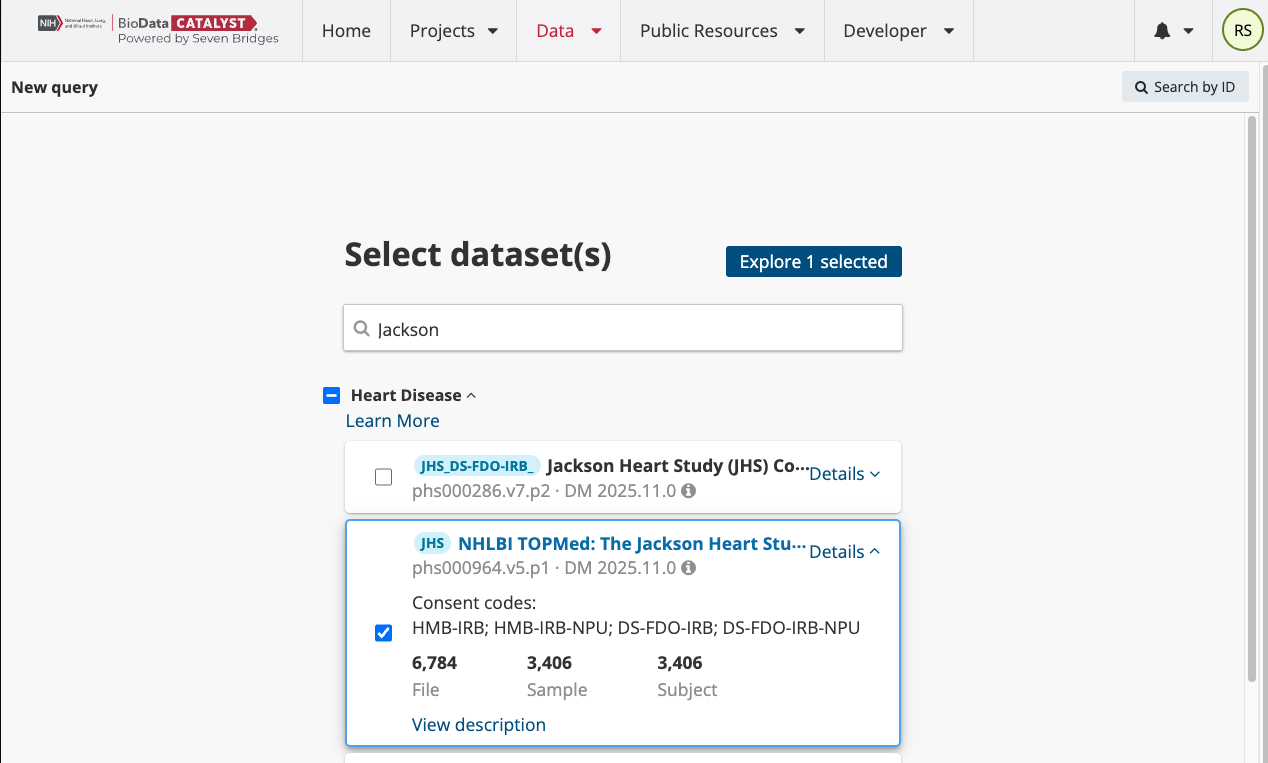
To see the list of available hosted studies on BioData Catalyst (like the TOPMed studies), navigate to “Data” on the top menu bar and then select the Data Browser. The Data Browser shows the list of hosted studies categorized by disease type. The phs numbers are listed for each study. TOPMed studies with genomic data are prefaced by “NHLBI TOPMed: XX.” Select “Details” to expand the box and see the consent groups for each study. You can also see information about the total number of files, samples, and subjects.
BioData Catalyst hosts multi-sample VCF files from TOPMed Freeze8 and the raw clinical files for these studies. These files are available per study and per consent group. These are the same files that a user would find in the dbGaP accession for the particular study except that BioData Catalyst hosts un-tarred versions of the files whereas dbGaP offers tarred versions. BioData Catalyst also hosts CRAM files. Follow the instructions below to see how to find specific file types for a TOPMed study and consent group.
Starting from the dataset selection page, select the study “NHLBI TOPMed: The Jackson Heart Study.” All TOPMed studies (genomic data) have the preface “NHLBI TOPMed” in the name. We will query only one dataset, however users have the option to select several hosted studies at once. Click “Explore 1 selected” to go to the query page of the Data Browser.
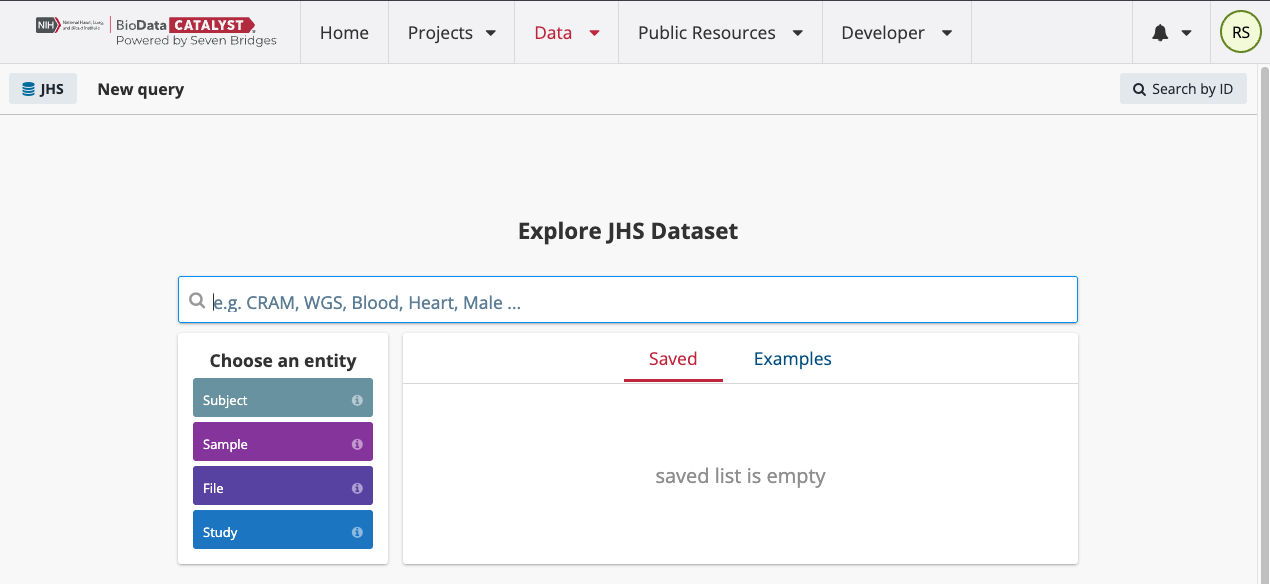
From the query page, users can see the list of active datasets on the left-hand side. They can search over several different entities to find files on the platform including Subject, Sample, and File. Each of these entities has a number of properties that you can filter through to search the file metadata. Select the File entity to begin this search. Your screen will look like the second image below.
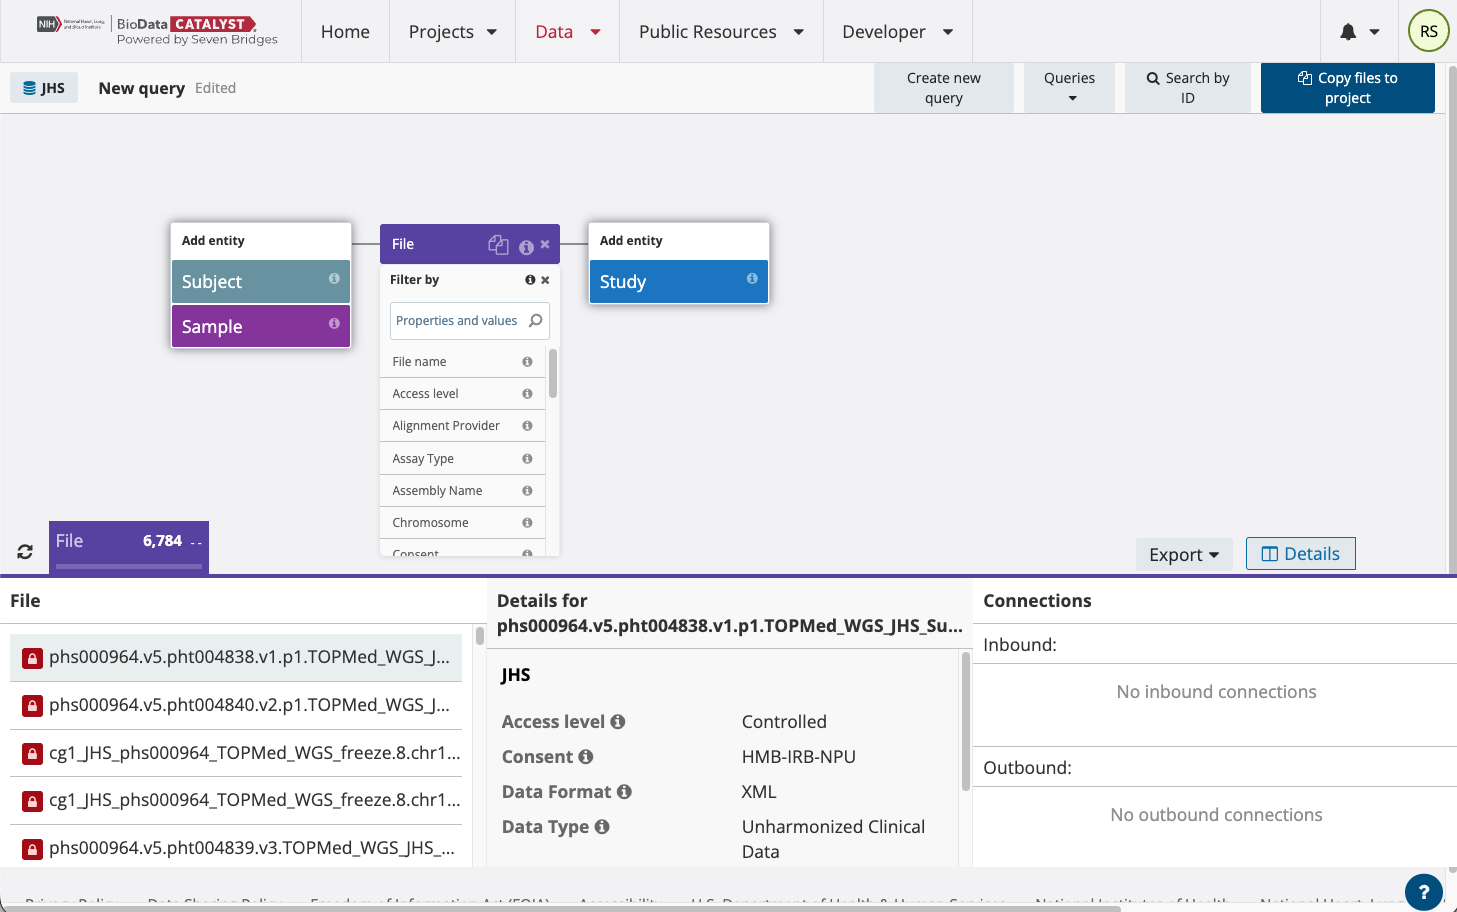
Now you can select the consent group you want to work with. In the File entity, select the “Consent” property. All of the consent groups in the selected study will be listed as shown below:
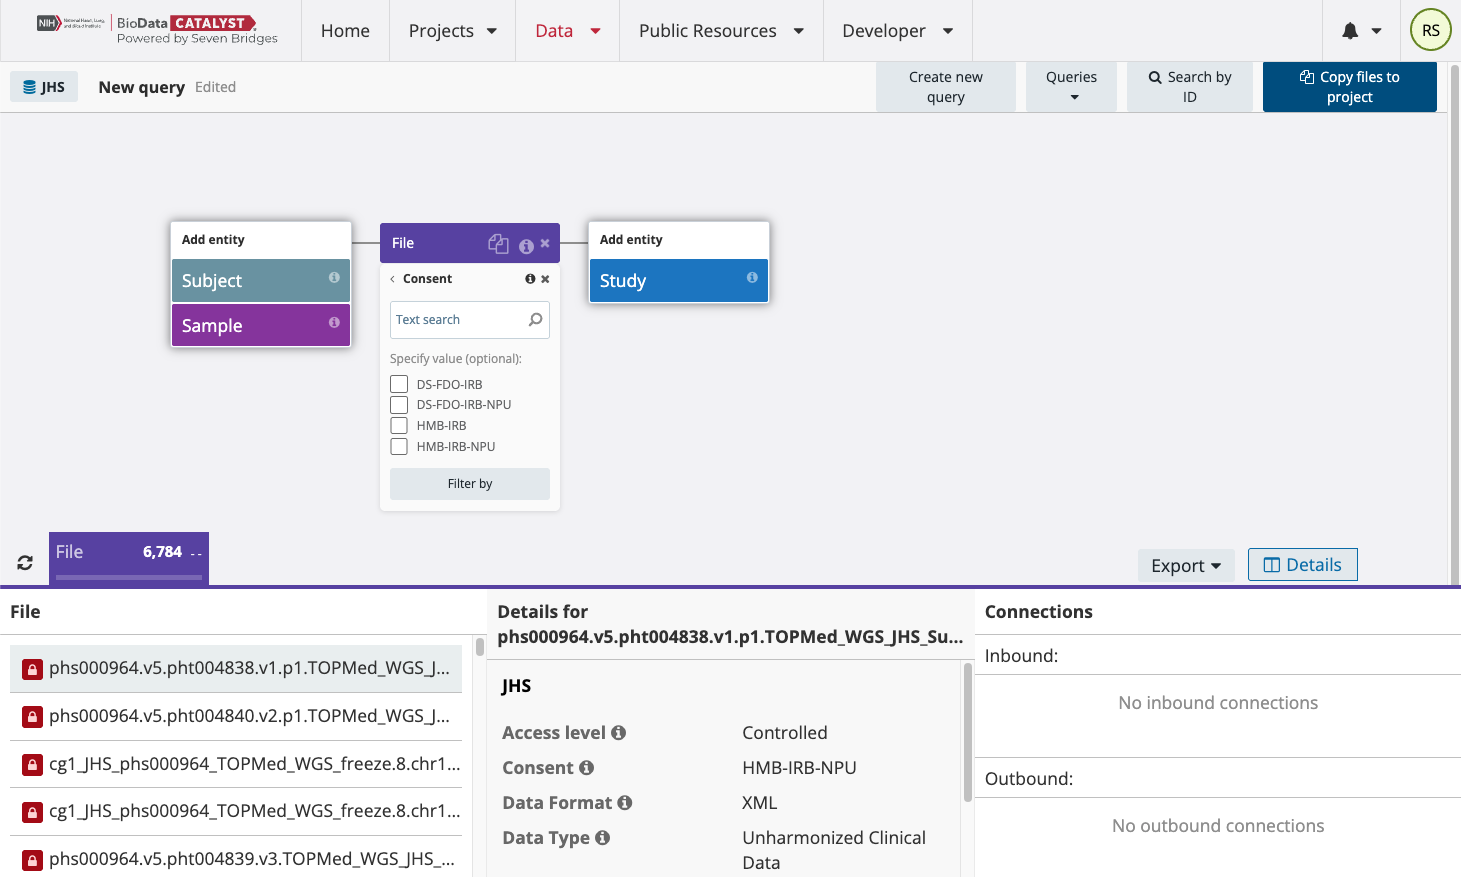
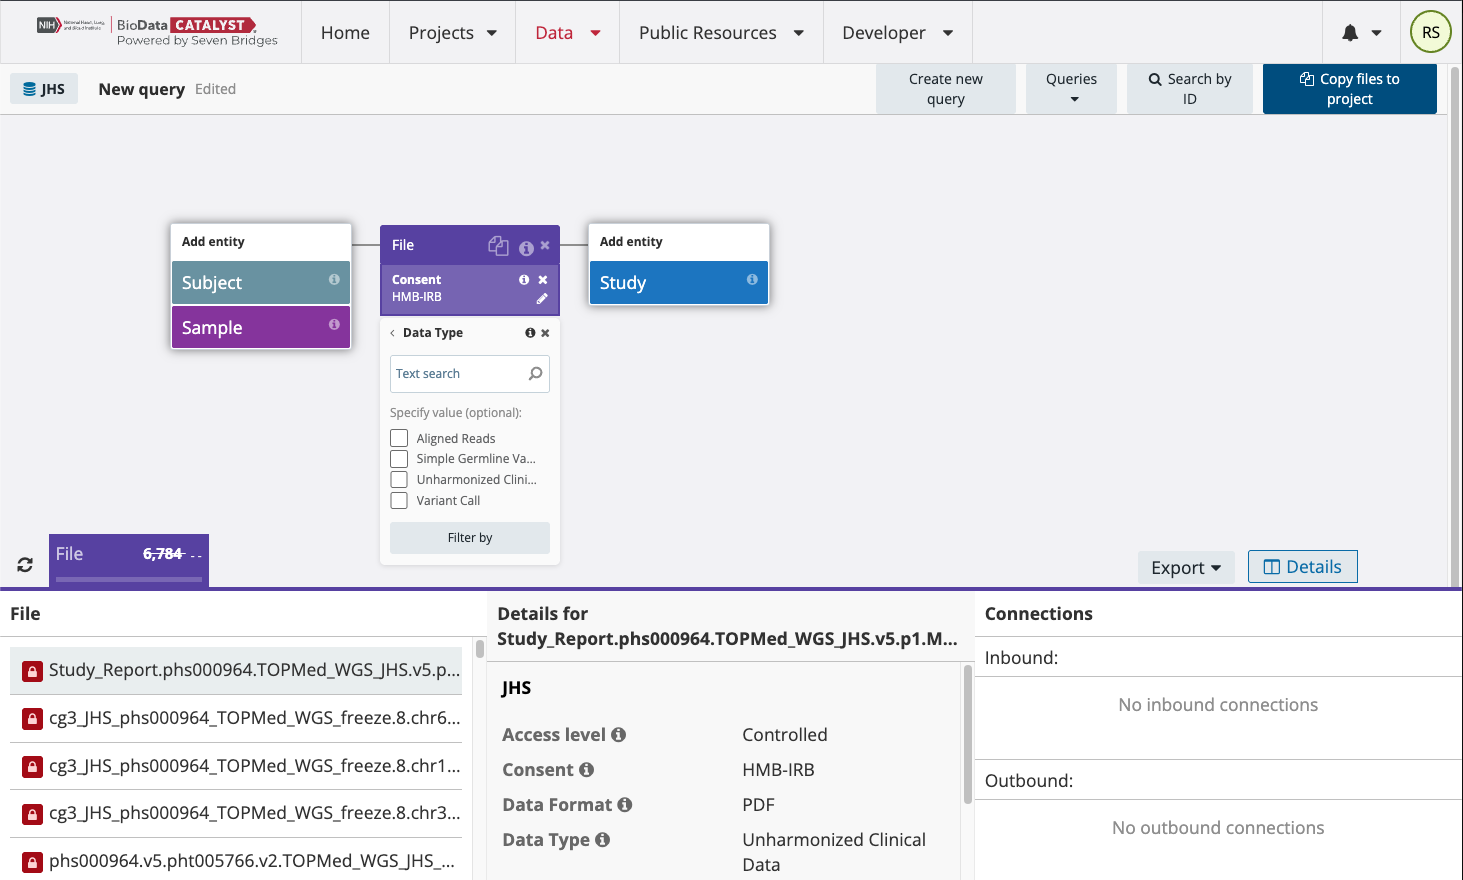
As an example, select HMB-IRB and “Filter by.” Now add the Property “Data Type,” which will show the 4 different types of files for this study:
- Aligned reads (CRAMs)
- Simple Germline Variation (single-sample VCFs)
- Unharmonized Clinical Data (phenotype files for each study consent group)
- Variant Call (multi-sample VCFs separated by chromosome for each study consent group)
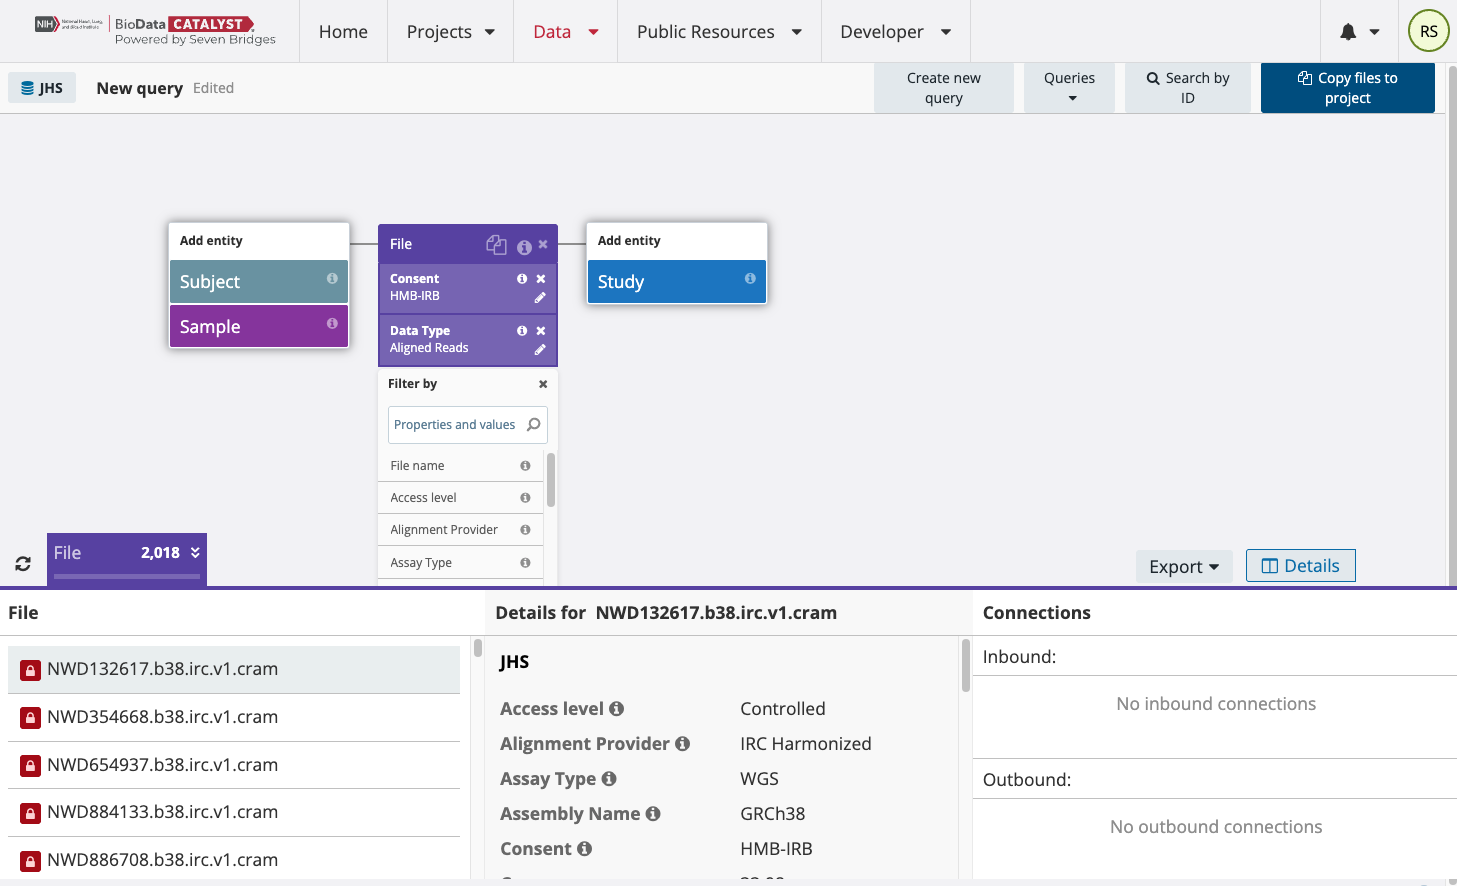
Select Aligned Reads and “Filter by” to find the CRAM files for this study and consent group. It is important to refresh the results in the lower left corner next to the file tab. This will show the total number of CRAM files for this study and consent group on BioData Catalyst.
To find the multi-sample VCF files from TOPMed Freeze8, edit the “Data Type” field of the above search. Check the box next to Variant Call instead of Aligned Reads. To search specifically for Freeze8 data and eliminate Freeze5 data from your search, add the “Freeze” property to the search.
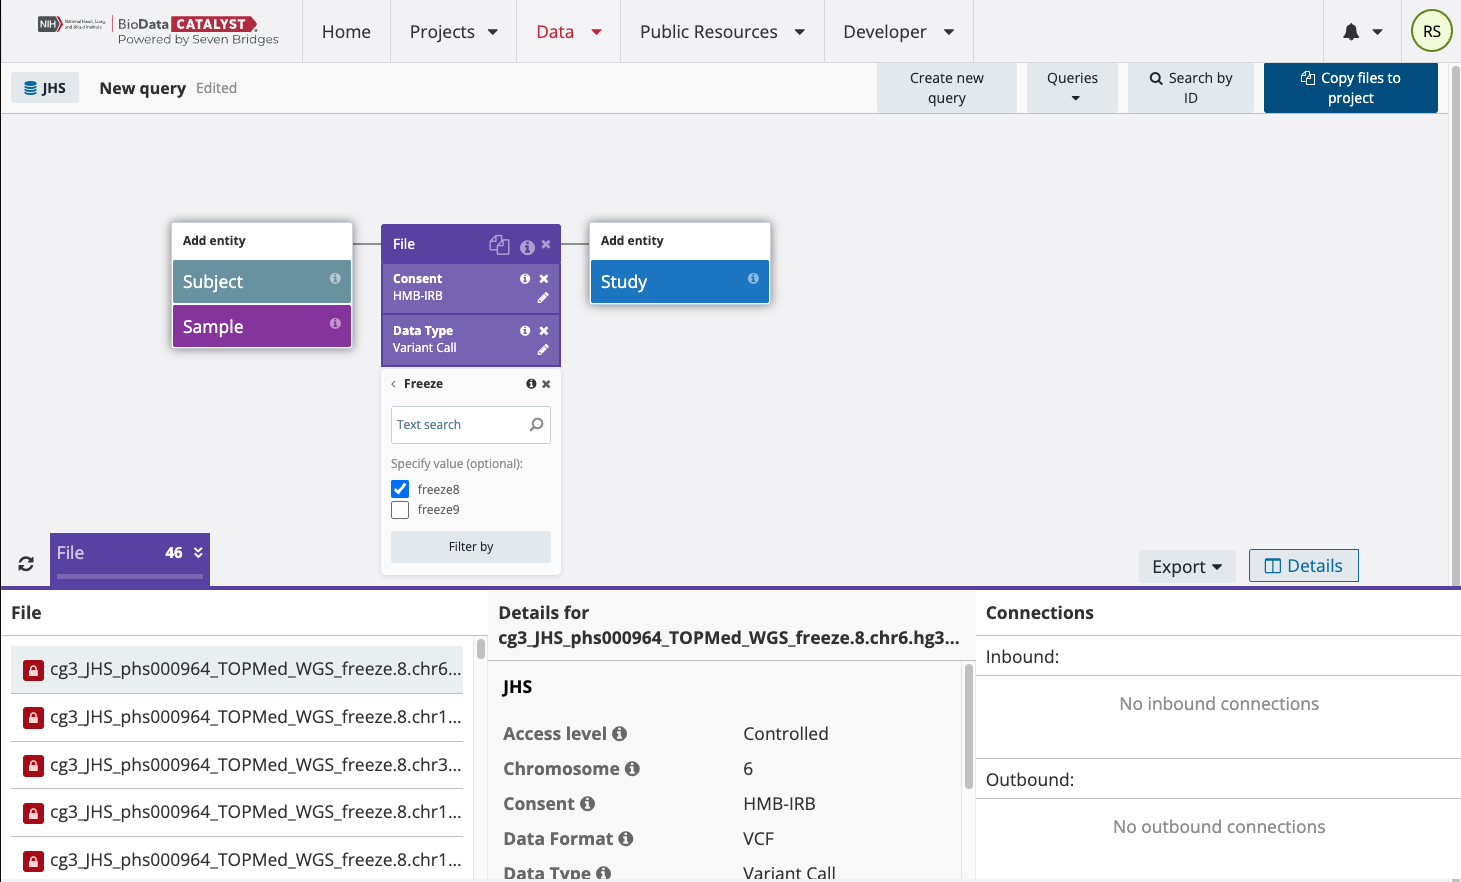
Filter by Freeze8 and refresh the results in the lower-right corner above the list of file names. For the Jackson Heart Study consent group HMB-IRB, you will now have found 23 multi-sample VCF files from TOPMed Freeze8, one for each chromosome.
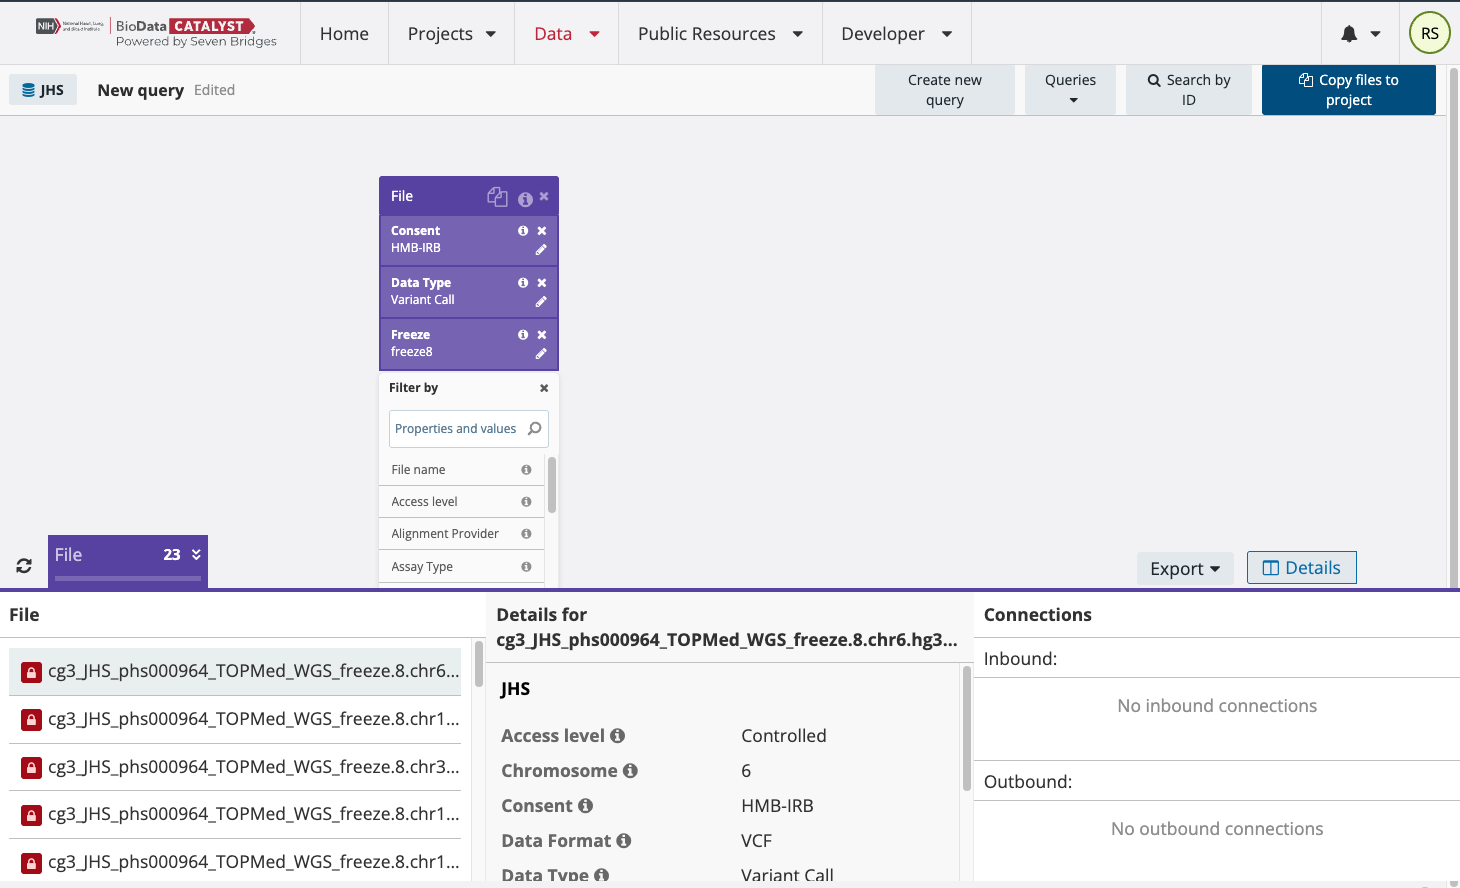
The file names identified are listed in the bottom part of the page with red lock symbols next to them to indicate that they are controlled files. To link these files to a project for analysis, select “Copy files to project” in the upper right-hand part of the page. Please note that users can only link files to a project if they are approved to access those files on dbGaP.
Therefore, if you are not approved for the “NHLBI TOPMed: The Jackson Heart Study” consent group HMB-IRB, the platform will prevent you from bringing these controlled files to a project.
Because these are controlled files, they must be linked to a project marked as controlled.
Only open access metadata is available for users to search over in the Data Browser, so all BioData Catalyst users can view all available studies on BioData Catalyst and perform the same searches.
Updated 14 days ago
